IHC Protocol for FFPE Tissue: A Step-by-Step Guide for Research & Clinical Applications
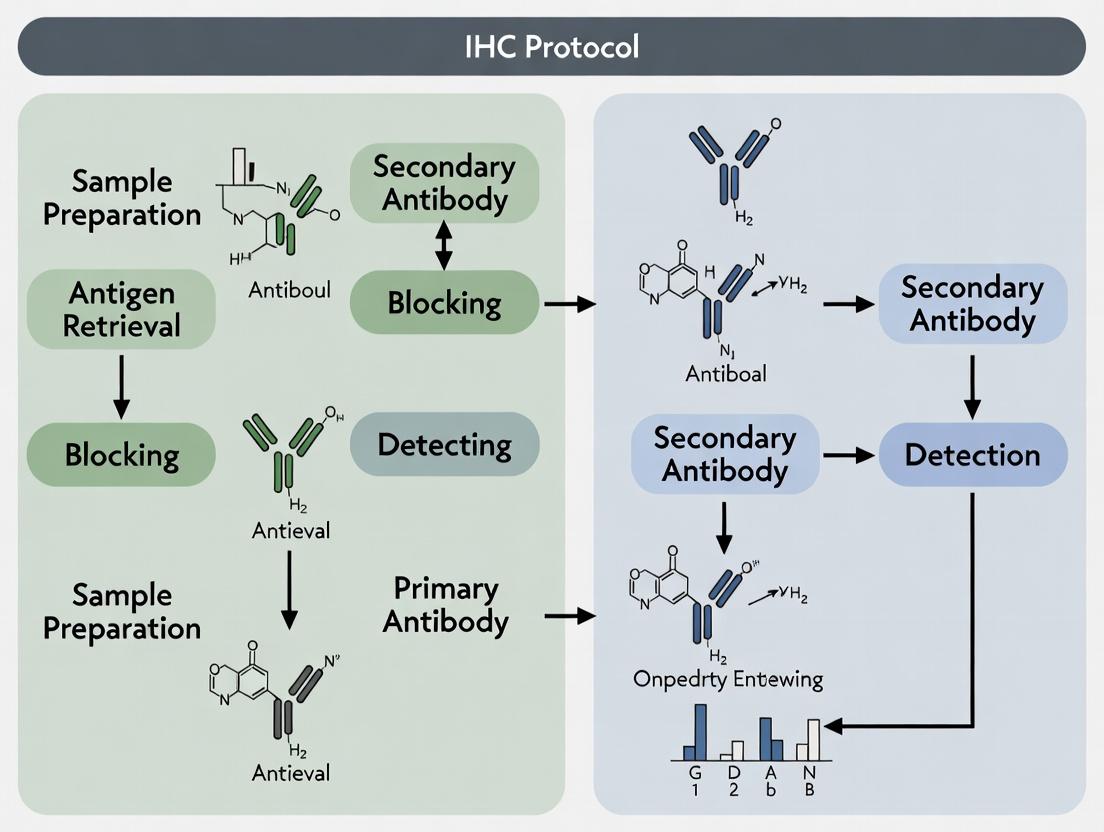
This comprehensive guide provides a detailed, step-by-step protocol for Immunohistochemistry (IHC) on Formalin-Fixed Paraffin-Embedded (FFPE) tissue sections.
IHC Protocol for FFPE Tissue: A Step-by-Step Guide for Research & Clinical Applications
Abstract
This comprehensive guide provides a detailed, step-by-step protocol for Immunohistochemistry (IHC) on Formalin-Fixed Paraffin-Embedded (FFPE) tissue sections. Tailored for researchers, scientists, and drug development professionals, it covers fundamental principles, a robust methodological workflow, advanced troubleshooting and optimization strategies, and essential validation techniques. The article integrates current best practices to ensure high-quality, reproducible results critical for preclinical research, biomarker discovery, and translational studies.
IHC on FFPE Tissue: Core Principles, Sample Prep, and Antigen Retrieval Essentials
Immunohistochemistry (IHC) is a cornerstone technique in biomedical research and clinical diagnostics, enabling the visualization and localization of specific antigens within the context of preserved tissue architecture. This technical guide details the core principles and methodologies within the framework of a step-by-step protocol for Formalin-Fixed Paraffin-Embedded (FFPE) tissue, a ubiquitous sample type in translational research and drug development.
Core Principles and Quantitative Considerations
IHC exploits the specific binding of antibodies to antigens in tissue sections. The bound antibody is then detected, typically via an enzymatic reaction producing a colored precipitate. Key quantitative parameters for assay optimization include:
Table 1: Critical IHC Optimization Parameters
| Parameter | Typical Range | Impact on Result |
|---|---|---|
| Antigen Retrieval pH (Citrate Buffer) | 6.0 | Optimal for many nuclear antigens (e.g., ER, PR). |
| Antigen Retrieval pH (EDTA/TRIS) | 8.0-9.0 | Optimal for many cytoplasmic/membrane antigens. |
| Primary Antibody Incubation | 1 hour (RT) to O/N (4°C) | Affects specificity and signal intensity. |
| Antibody Dilution | 1:50 to 1:1000+ | Must be titrated to balance signal-to-noise. |
| DAB Incubation Time | 30 seconds to 10 minutes | Directly controls chromogen intensity. |
| Counterstain (Hematoxylin) Time | 30 seconds to 2 minutes | Controls nuclear contrast. |
Table 2: Common Detection Systems and Sensitivities
| System | Amplification Method | Approximate Sensitivity (Molecules) | Common Use |
|---|---|---|---|
| Direct (Conjugate-Labeled) | None | Low | Rare for FFPE; high-abundance targets. |
| Indirect (Enzyme-Labeled) | Secondary Antibody | Medium | Routine, well-characterized targets. |
| Avidin-Biotin Complex (ABC) | Biotin-Streptavidin + Enzyme | High | Low-abundance targets; increased background risk. |
| Polymer-Based (e.g., HRP-Polymer) | Multiple Enzyme Molecules | High | Standard for FFPE; low background. |
| Tyramide Signal Amplification (TSA) | Catalytic Deposition of Tyramide | Very High | Ultralow-abundance targets; requires stringent optimization. |
Experimental Protocol: A Core IHC Workflow for FFPE Tissue
The following is a detailed methodology for a standard polymer-based IHC protocol on FFPE tissue sections.
Protocol: Standard Polymer-Based IHC for FFPE Tissue
- Deparaffinization and Rehydration:
- Bake slides at 60°C for 30-60 minutes.
- Immerse in fresh xylene or substitute, 3 changes, 5 minutes each.
- Hydrate through graded ethanols: 100% (twice), 95%, 80%, 70% (2 minutes each).
- Rinse in deionized water.
Antigen Retrieval:
- Place slides in preheated target retrieval solution (e.g., citrate pH 6.0 or EDTA/Tris pH 9.0) in a decloaking chamber or pressure cooker.
- Heat at 95-100°C for 20 minutes.
- Cool at room temperature for 30 minutes.
- Rinse in deionized water, then place in wash buffer (e.g., 1X Tris-Buffered Saline with Tween 20, TBST).
Endogenous Peroxidase Blocking:
- Apply 3% hydrogen peroxide solution for 10 minutes at room temperature.
- Rinse thoroughly with wash buffer.
Protein Blocking:
- Apply normal serum (from species unrelated to secondary antibody) or a commercial protein block for 30 minutes to reduce non-specific binding.
Primary Antibody Incubation:
- Tap off blocking solution. Apply optimally titrated primary antibody diluted in antibody diluent.
- Incubate in a humidified chamber for 1 hour at room temperature or overnight at 4°C.
- Rinse with wash buffer, 3 changes for 5 minutes each.
Polymer Detection:
- Apply enzyme-labeled polymer conjugated with secondary antibodies (e.g., anti-rabbit/mouse HRP-polymer) for 30 minutes at room temperature.
- Rinse with wash buffer, 3 changes for 5 minutes each.
Chromogen Development:
- Prepare DAB substrate solution immediately before use.
- Apply DAB to tissue sections and monitor development under a microscope (typically 2-10 minutes).
- Immerse slides in deionized water to stop the reaction.
Counterstaining and Mounting:
- Counterstain with hematoxylin for 30-60 seconds.
- Rinse in tap water, then perform a quick blueing step in weak ammonia water or buffer.
- Dehydrate through graded ethanols (70%, 80%, 95%, 100% twice) and clear in xylene.
- Mount with permanent mounting medium.
Signaling Pathways & Workflow Visualizations
Title: Core IHC Workflow for FFPE Tissue
Title: Polymer-Based IHC Detection Principle
The Scientist's Toolkit: Essential Research Reagent Solutions
Table 3: Essential Reagents for IHC Protocol
| Item | Function | Key Considerations |
|---|---|---|
| FFPE Tissue Sections | The analyte source; preserves morphology and antigenicity. | Section thickness (3-5 µm) is critical for consistency. |
| Target Retrieval Buffer (Citrate, pH 6.0 or EDTA/Tris, pH 9.0) | Reverses formaldehyde cross-links to expose epitopes. | pH choice is antigen-dependent; heating method is critical. |
| Validated Primary Antibody | Specifically binds the target protein (antigen). | Clone, host species, recommended dilution for FFPE must be confirmed. |
| Polymer-Based Detection System (HRP-labeled) | Amplifies signal by linking many enzyme molecules to the primary antibody. | Reduces non-specific background vs. ABC systems; species-specific. |
| DAB Chromogen Substrate Kit | Enzymatic conversion produces a stable, colored precipitate at the antigen site. | Liquid DAB+ formulations offer higher sensitivity; handling requires care. |
| Hematoxylin Counterstain | Provides contrast by staining nuclei blue. | Differentiation (acid alcohol) and blueing steps are crucial for clarity. |
| Mounting Medium | Preserves stained slide under a coverslip for microscopy. | Aqueous for fluorescent detection; permanent resinous for DAB slides. |
| Positive Control Tissue | Tissue known to express the target antigen. | Essential for validating the entire protocol run. |
| Isotype Control / Negative Control Antibody | Controls for non-specific antibody binding. | Distinguishes specific signal from background. |
Why FFPE Tissues? The Gold Standard for Archival and Diagnostic Samples
Formalin-Fixed Paraffin-Embedded (FFPE) tissue preservation remains the cornerstone of anatomical pathology, biobanking, and translational research. Within the context of a comprehensive immunohistochemistry (IHC) protocol, the choice of FFPE samples is foundational. This guide details the rationale for its enduring status and outlines the critical initial steps for research.
The Unmatched Advantages of FFPE Archiving
FFPE tissue fixation and embedding create a stable, durable resource that preserves morphological details for decades to centuries. The process involves neutral buffered formalin fixation, which cross-links proteins and nucleic acids, followed by dehydration, clearing, and embedding in solid paraffin wax. This stabilizes tissue architecture indefinitely at room temperature.
Table 1: Quantitative Comparison of Tissue Preservation Methods
| Parameter | FFPE | Fresh Frozen | Other Fixatives (e.g., Bouin's, Carnoy's) |
|---|---|---|---|
| Morphology Preservation | Excellent, high-resolution detail | Good, but can have ice crystal artifacts | Variable, often specialized |
| Nucleic Acid Integrity | Fragmented DNA/RNA, but recoverable | High-quality, intact DNA/RNA | Often highly degraded |
| Protein Antigenicity | Requires antigen retrieval; good post-AR | High; no retrieval needed | Variable, often poor for IHC |
| Room Temp Storage | Indefinite (>100 years) | Requires -80°C or liquid N₂ | Indefinite, but less common |
| Cost & Infrastructure | Low cost, minimal infrastructure | High cost for freezers, monitoring | Low cost |
| Compatibility | IHC, H&E, ISH, some proteomics | Biochemistry, molecular assays, some IHC | Limited, often for specific stains |
| Tissue Database Linkage | Direct link to rich patient history | Possible, but often less established | Possible |
Core Protocol: Initial FFPE Processing for IHC Research
The journey of an FFPE sample through an IHC protocol begins with meticulous preparation.
Protocol 1: Tissue Fixation and Processing
- Objective: To preserve tissue morphology and prevent degradation.
- Materials: Neutral Buffered Formalin (NBF), tissue cassettes, automated tissue processor.
- Methodology:
- Fixation: Immerse fresh tissue specimen in 10% NBF promptly after dissection. Use a volume 10-20 times the tissue volume. Fixation time is critical: 6-72 hours depending on tissue size (typically 24 hours for standard biopsies). Under-fixation causes poor morphology; over-fixation excessively masks antigens.
- Dehydration: Process fixed tissue through a graded series of ethanol baths (e.g., 70%, 80%, 95%, 100%) to remove water.
- Clearing: Submerge tissue in a xylene or xylene-substitute to remove alcohol and facilitate paraffin infiltration.
- Infiltration & Embedding: Impregnate tissue with molten paraffin wax in an oven (~60°C). Orient tissue in a mold, cover with wax, and cool rapidly to form a solid block.
Protocol 2: Microtomy and Slide Preparation
- Objective: To generate thin tissue sections mounted on slides for analysis.
- Materials: Microtome, water bath, positively charged or adhesive glass slides.
- Methodology:
- Sectioning: Trim the paraffin block face. Cut ribbons of tissue sections at 4-5 µm thickness using a microtome.
- Floating: Float sections on a warm water bath (40-45°C) to remove wrinkles.
- Mounting: Pick up sections onto labeled glass slides.
- Drying: Dry slides upright in an oven at 37-60°C for 30-60 minutes to ensure adhesion. Slides can now be stored or proceed to deparaffinization.
FFPE Tissue Processing and Sectioning Workflow
The Antigen Retrieval Imperative in IHC
The key challenge and subsequent breakthrough for FFPE-IHC is antigen retrieval (AR). Formalin cross-linking masks epitopes, making them undetectable by antibodies. AR reverses these cross-links.
IHC Antigen Retrieval Decision Pathway
Protocol 3: Heat-Induced Epitope Retrieval (HIER)
- Objective: To break protein cross-links and expose hidden epitopes.
- Materials: Coplin jars or slide holder, citrate (pH 6.0) or Tris-EDTA (pH 9.0) buffer, microwave, pressure cooker, or steamer.
- Methodology:
- Deparaffinization & Rehydration: Pass slides through xylene (2 changes, 5 min each) to remove paraffin, then through graded ethanol (100%, 95%, 70%) to water.
- Buffer Heating: Place slides in a container filled with AR buffer. Heat using the chosen method:
- Pressure Cooker: 125°C, 3 minutes at full pressure.
- Microwave/Steamer: 95-98°C, 20-40 minutes.
- Cooling: Allow slides to cool in the buffer at room temperature for 20-30 minutes.
- Rinsing: Rinse slides in distilled water, then place in wash buffer (e.g., PBS).
The Scientist's Toolkit: Essential Reagents for FFPE-IHC
Table 2: Key Research Reagent Solutions for FFPE-IHC Protocols
| Reagent / Material | Primary Function |
|---|---|
| Neutral Buffered Formalin (10%) | Primary fixative. Cross-links proteins to preserve morphology. |
| Paraffin Wax | Embedding medium. Provides support for microtomy and enables room-temperature storage. |
| Xylene or Substitutes | Clearing agent. Removes alcohol to allow paraffin infiltration; used for deparaffinization. |
| Antigen Retrieval Buffers | (Citrate pH 6.0, Tris-EDTA pH 9.0). Breaks formalin cross-links to unmask epitopes for antibody binding. |
| Peroxidase Block | (e.g., 3% H₂O₂). Quenches endogenous peroxidase activity to reduce background in HRP-based detection. |
| Protein Block | (e.g., BSA, Normal Serum). Reduces non-specific background staining by blocking hydrophobic sites. |
| Primary Antibodies (Validated) | Specifically bind to the target antigen of interest. Must be validated for use on FFPE tissue. |
| Detection System | (e.g., HRP Polymer with Chromogen DAB). Visualizes the antibody-antigen complex. |
| Hematoxylin Counterstain | Provides nuclear contrast to the chromogenic stain, allowing histological assessment. |
| Mounting Medium | Preserves the stained slide under a coverslip for microscopy and archiving. |
Within the rigorous framework of IHC protocol development for FFPE tissues, the pre-analytical phase is not merely a preparatory step but the foundational determinant of experimental validity. This whitepaper, integral to a broader thesis on step-by-step IHC optimization, details how variables in fixation, processing, and embedding irrevocably impact antigen integrity, tissue morphology, and ultimately, the reliability of diagnostic and research data. Mastery of these initial steps is non-negotiable for reproducible, high-quality immunohistochemistry.
Fixation: The Critical First Arrest
Fixation halts autolysis and preserves tissue architecture. The choice of fixative, concentration, and duration directly dictates antigen availability for subsequent IHC staining.
- Primary Fixative: Neutral Buffered Formalin (NBF): The universal standard, typically 10% NBF. It cross-links proteins, creating a meshwork that stabilizes tissue but can mask epitopes.
- Key Variable: Fixation Duration: Insufficient fixation causes poor morphology; over-fixation leads to excessive cross-linking and antigen masking, requiring more aggressive retrieval.
Table 1: Impact of Formalin Fixation Time on IHC Outcomes
| Fixation Time (Hours) | Morphologic Preservation | Antigen Masking Effect | Typical IHC Outcome |
|---|---|---|---|
| < 6 (Insufficient) | Suboptimal; may be soft | Minimal | Variable, high background risk |
| 6-24 (Optimal) | Excellent | Moderate, reversible | Strong, specific staining |
| 24-48 (Prolonged) | Excellent | Significant | Weakened signal; requires optimized retrieval |
| > 72 (Excessive) | Brittle tissue | Severe | Potential false negatives; may require specialized protocols |
Protocol: Standard Tissue Fixation for IHC-Quality Samples
- Dissection & Trimming: Excise tissue promptly (<30 minutes post-collection). Trim to dimensions not exceeding 1.0 cm x 1.0 cm x 0.4 cm to ensure rapid, uniform fixative penetration.
- Immersion Fixation: Immediately immerse tissue in a volume of 10% NBF that is 15-20 times the tissue volume.
- Fixation Duration: Fix at room temperature for 18-24 hours. For delicate tissues (e.g., lymph nodes), 6-12 hours may be sufficient.
- Post-Fixation Rinse: Following fixation, rinse tissue thoroughly in 70% ethanol or phosphate-buffered saline to halt fixation and prepare for processing.
Tissue Processing: Dehydration, Clearing, and Infiltration
Processing removes water and lipids from fixed tissue and replaces them with a medium that supports microtomy—paraffin wax.
- Critical Principle: Gradual transitions between solutions are essential to prevent tissue distortion (artifacts).
- Modern Standard: Automated closed tissue processors ensure consistency and safety.
Table 2: Standard Automated Processing Schedule for FFPE Tissues
| Step | Reagent | Time (Hours) | Purpose & Rationale |
|---|---|---|---|
| 1 | 70% Ethanol | 1.0 | Dehydration; gentle start to avoid shock |
| 2 | 80% Ethanol | 1.0 | Continued dehydration |
| 3 | 95% Ethanol | 1.0 | Further water removal |
| 4 | 100% Ethanol I | 1.0 | Complete dehydration |
| 5 | 100% Ethanol II | 1.0 | Ensures absolute water removal |
| 6 | Xylene or Substitute I | 1.0 | Clearing; ethanol-paraffin intermediary |
| 7 | Xylene or Substitute II | 1.0 | Complete clearing for optimal wax infiltration |
| 8 | Paraffin Wax I | 1.0-1.5 | Infiltration at 55-60°C |
| 9 | Paraffin Wax II | 1.0-1.5 | Final infiltration under vacuum |
Note: Times are for standard 2-4mm thick biopsies. Larger specimens require increased times.
Embedding: Orienting the Sample for Sectioning
Embedding involves orienting the processed tissue in a mold filled with molten paraffin, which is then cooled to form a solid block. Orientation is critical for visualizing desired anatomical planes.
Protocol: Manual Paraffin Embedding for Optimal Sectioning
- Mold Preparation: Fill a base mold with molten paraffin from the processor reservoir.
- Tissue Orientation: Using warm forceps, quickly retrieve the tissue from the cassette. Place it into the mold in the desired cutting plane (e.g., mucosal surface facing down for longitudinal sections).
- Cassette Placement: Seat the labeled cassette (lid removed) on top of the mold as a backing.
- Fill and Chill: Completely fill the mold-cassette assembly with paraffin. Transfer it to a chilled plate (-4°C to 0°C) for rapid, uniform solidification.
- Storage: Store blocks at 4°C in a dry environment to minimize oxidation and water absorption.
The Scientist's Toolkit: Research Reagent Solutions
Table 3: Essential Materials for Pre-Analytical Phase Control
| Item | Function & Importance in Pre-Analytics |
|---|---|
| 10% Neutral Buffered Formalin (NBF) | Gold-standard fixative. Buffer maintains pH 7.2-7.4, preventing acid-induced artifacts and preserving nucleic acid integrity. |
| Ethanol Series (70%, 80%, 95%, 100%) | Graded alcohols for progressive dehydration. Prevents severe tissue shrinkage and distortion. |
| Xylene or Safer Clearing Agents (e.g., Limonene) | Clears alcohol to allow paraffin infiltration. Safer substitutes reduce toxicity. |
| High-Grade Paraffin Wax (52-58°C melting point) | Embedding medium. Low-melting-point, polymer-added waxes improve ribboning and sectioning. |
| Tissue Processing/Embedding Cassettes | Holds tissue through processing; becomes part of the final block for labeling and microtomy. |
| Cold Plate for Embedding | Ensures rapid, even wax solidification, minimizing crystallization and improving block consistency. |
Visualizations
Title: Pre-Analytical Variables Influence on Final IHC Results
Title: FFPE Tissue Workflow from Biopsy to Section
The pre-analytical steps of fixation, processing, and embedding constitute an interdependent chain where each variable directly conditions the success of all subsequent IHC protocols. Standardization and meticulous documentation of these steps are paramount. Within a comprehensive IHC research thesis, establishing and rigorously controlling these pre-analytical conditions is the essential prerequisite for generating data that is both scientifically robust and clinically meaningful.
The Science Behind Antigen Masking in FFPE Tissues
In the context of a comprehensive thesis on step-by-step immunohistochemistry (IHC) protocol development for Formalin-Fixed Paraffin-Embedded (FFPE) tissues, understanding antigen masking is paramount. Fixation and embedding are essential for preserving tissue morphology, but they simultaneously induce chemical modifications that obscure epitopes. This creates a central paradox in IHC: the very process that stabilizes the sample for analysis can render the target antigens undetectable. This whitepaper provides an in-depth technical guide to the molecular mechanisms of antigen masking and the scientific rationale behind the key retrieval techniques that reverse it, forming the critical bridge between tissue preparation and successful immunolabeling.
Core Mechanisms of Antigen Masking
The masking of antigens in FFPE tissues is not a single event but a multi-step process initiated during fixation.
2.1. The Role of Formaldehyde Crosslinking Formalin (aqueous formaldehyde) primarily reacts with the amino groups of proteins (lysine, arginine, N-termini), creating methylol adducts. These adducts subsequently react with other nitrogen nucleophiles or amide groups to form stable, irreversible methylene bridges (-CH2-). This crosslinking network physically entraps epitopes within a mesh of proteins.
2.2. Additional Contributing Factors
- Protein Precipitation: Formaldehyde alters protein conformation, leading to aggregation and precipitation.
- Calcium Coordination: Formalin often contains calcium salts, which can precipitate and form insoluble complexes with tissue components.
- Paraffin Infiltration: The hydrophobic environment of molten paraffin can further denature and shield hydrophilic epitopes.
Table 1: Key Chemical Reactions in Formalin-Induced Antigen Masking
| Reaction Step | Primary Reactants | Product | Consequence for Antigen |
|---|---|---|---|
| Primary Addition | Protein -NH2 + HCHO | Protein -NH-CH2OH (Methylol adduct) | Alters charge and conformation |
| Crosslinking (Schiff base) | Methylol adduct + -NH2 | Protein -NH-CH2-NH-Protein + H2O | Creates covalent protein mesh |
| Crosslinking (with amide) | Methylol adduct + -CONH- | Protein -NH-CH2-N-CO-Protein | Further stabilizes the protein network |
Antigen Retrieval: Reversing the Mask
Antigen Retrieval (AR) aims to break the crosslinks or otherwise reverse the masking without destroying tissue architecture. The two principal methods are Heat-Induced Epitope Retrieval (HIER) and Proteolytic-Induced Epitope Retrieval (PIER).
3.1. Heat-Induced Epitope Retrieval (HIER) Principle: Application of high heat in a specific pH buffer hydrolyzes the methylene bridges and reverses calcium-coordinate complexes. Protocol (Standard Citrate Buffer Method):
- Deparaffinization & Hydration: Cut 4-5 µm sections. Bathe in xylene (or substitute) 2 x 5 min, 100% ethanol 2 x 3 min, 95% ethanol 2 x 3 min, rinse in dH2O.
- Buffer Preparation: 10 mM Sodium Citrate Buffer, pH 6.0. Alternatively, Tris-EDTA buffer (pH 9.0) can be used for more challenging targets.
- Heating: Place slides in pre-filled slide holder containing retrieval buffer. Heat in a pressure cooker (≈121°C for 15 min), microwave (95-100°C for 15-20 min with replenishment), steamer (95-100°C for 30 min), or water bath.
- Cooling: Allow the container to cool at room temperature for 20-30 minutes.
- Rinsing: Rinse slides in distilled water, then proceed to PBS and subsequent IHC steps.
3.2. Proteolytic-Induced Epitope Retrieval (PIER) Principle: Enzymatic digestion (e.g., trypsin, proteinase K) cleaves peptide bonds, physically cutting through the crosslinked protein mesh to expose epitopes. Protocol (Trypsin Digestion):
- Deparaffinization & Hydration: As per HIER steps 1.
- Enzyme Solution: Prepare 0.1% Trypsin in 0.1% CaCl2 solution (in dH2O), pH to 7.8. Pre-warm to 37°C.
- Digestion: Incubate slides in enzyme solution at 37°C for 5-20 minutes. Optimization of time is critical.
- Stopping Reaction: Rinse slides thoroughly in dH2O or PBS.
Table 2: Comparison of Antigen Retrieval Methodologies
| Parameter | Heat-Induced Epitope Retrieval (HIER) | Proteolytic-Induced Epitope Retrieval (PIER) |
|---|---|---|
| Primary Mechanism | Hydrolysis of crosslinks, calcium chelation | Proteolytic cleavage of peptide bonds |
| Key Agents | Citrate (pH 6.0), Tris-EDTA (pH 8-9.5) buffers | Trypsin, Proteinase K, Pepsin |
| Typical Conditions | 95-121°C for 10-30 minutes | 37°C for 5-30 minutes |
| Advantages | Broad spectrum, high efficacy, reproducible | Gentle on tissue, effective for some fixed epitopes |
| Disadvantages | Can damage morphology, requires optimization of pH/time | Over-digestion risk, less predictable, enzyme-specific |
Title: Decision Flow for Antigen Retrieval Strategies in FFPE IHC
The Scientist's Toolkit: Key Research Reagent Solutions
Table 3: Essential Materials for Antigen Retrieval & Masking Research
| Item | Function & Rationale |
|---|---|
| Sodium Citrate Buffer (10mM, pH 6.0) | The most common HIER buffer. Low pH promotes hydrolysis of methylene bridges formed during formalin fixation. |
| Tris-EDTA Buffer (1mM EDTA, 10mM Tris, pH 9.0) | High-pHIER buffer. Effective for many nuclear antigens and phosphorylated epitopes. EDTA chelates calcium ions. |
| Trypsin (0.05-0.1%) | Serine protease for PIER. Cleaves peptide bonds at lysine/arginine. Concentration and time require precise optimization. |
| Proteinase K (ready-to-use) | Broad-spectrum serine protease for PIER. Often used for more heavily crosslinked tissues or viral antigens. |
| Pressure Cooker / Decloaking Chamber | Provides consistent, high-temperature (121°C) heating for HIER, considered the gold standard for many targets. |
| Microwave / Steamer | Alternative heating devices for HIER. Microwave offers rapid heating but requires buffer replenishment. |
| HIER pH & Time Optimization Kit | Commercial kits providing buffers at incremental pH values (e.g., 3, 6, 8, 9) to systematically optimize retrieval for a new antibody. |
| Protease Inhibitor Cocktail | Critical control. Added after PIER to immediately and completely halt enzymatic activity, preventing tissue degradation. |
| Validated Positive Control Tissue | Tissue known to express the target antigen at measurable levels. Essential for validating the success of the retrieval step. |
Experimental Protocol for Antigen Retrieval Optimization
A systematic approach is required to develop a robust IHC protocol.
5.1. Hypothesis-Driven Optimization If a new primary antibody yields weak or negative staining on known positive FFPE controls, the hypothesis is that the standard AR conditions are insufficient to unmask the specific epitope.
5.2. Methodology: A Factorial Design Experiment
- Variables: AR Method (HIER vs PIER), Buffer pH (6.0 vs 9.0), Retrieval Time (10 min vs 20 min).
- Positive Control: FFPE cell pellet or tissue section with known antigen expression.
- Negative Control: Omission of primary antibody.
- Procedure:
- Cut serial sections from the control block.
- Deparaffinize and hydrate all slides simultaneously.
- Apply the different AR conditions from the factorial design to each slide group.
- Process all slides with an identical, standardized IHC protocol post-retrieval (same antibody dilution, incubation time, detection system).
- Perform semi-quantitative analysis (e.g., H-score) or quantitative image analysis of staining intensity and percentage of positive cells.
Title: Workflow for Systematic Antigen Retrieval Optimization
Within the framework of a step-by-step IHC research thesis, the antigen retrieval step is not a mere "protocol note" but a fundamental experimental variable grounded in protein chemistry. The choice and optimization of HIER or PIER directly determine the success or failure of the entire assay. A deep understanding of the science behind antigen masking empowers the researcher to systematically troubleshoot staining failures, validate novel antibodies, and ensure that observed results reflect true biology rather than an artifact of tissue processing. Mastery of this step transforms IHC from a qualitative technique into a robust, reproducible research tool for drug development and discovery.
This technical guide details the core components of immunohistochemistry (IHC), framed within the context of a step-by-step research protocol for Formalin-Fixed, Paraffin-Embedded (FFPE) tissue. Mastery of these elements—antibodies, detection systems, and chromogens—is fundamental to generating specific, sensitive, and reproducible data in biomedical research and drug development.
Antibodies: Primary and Secondary
Antibodies are the foundation of specificity in IHC. They are immunoglobulins (Ig) that bind with high affinity to specific epitopes (antigenic determinants).
Primary Antibodies
These bind directly to the target antigen of interest. Selection is critical and depends on:
- Clonality: Monoclonal antibodies (from a single B-cell clone) offer high specificity to a single epitope. Polyclonal antibodies (from multiple B-cell clones) recognize multiple epitopes on the same antigen, often increasing sensitivity but with a higher risk of cross-reactivity.
- Host Species: Determines compatibility with the detection system (e.g., mouse, rabbit, goat).
- Validation for IHC-FFPE: Antibodies must be validated for use on FFPE tissue, as fixation can mask or alter epitopes.
Secondary Antibodies
These are conjugated to an enzyme or fluorophore and bind to the constant region (Fc) of the primary antibody. They are critical for signal amplification and detection.
Table 1: Primary Antibody Characteristics
| Feature | Monoclonal | Polyclonal |
|---|---|---|
| Source | Single B-cell clone | Multiple B-cell clones |
| Epitope Specificity | Single, defined epitope | Multiple epitopes on the same antigen |
| Specificity | High | Moderate (risk of cross-reactivity) |
| Sensitivity | Generally lower | Generally higher (multiple epitopes bound) |
| Batch Consistency | High | Variable |
| Typical Use | Well-characterized, abundant antigens | Low-abundance or denatured antigens |
Detection Systems
Detection systems amplify the primary antibody signal to a detectable level. For chromogenic IHC, enzyme-based systems are standard.
Horseradish Peroxidase (HRP) Systems
HRP catalyzes the oxidation of a chromogen in the presence of hydrogen peroxide (H₂O₂). A common, highly sensitive amplification method is the Avidin-Biotin Complex (ABC) method, though polymer-based systems are now predominant due to lower background.
Alkaline Phosphatase (AP) Systems
AP catalyzes the removal of a phosphate group from a substrate, leading to chromogen precipitation. Used when endogenous peroxidase activity is high or for multiplexing.
Key Protocol: Standard Polymer-Based HRP Detection (for Rabbit Primary Antibody)
- Deparaffinization & Rehydration: Incubate FFPE slides in xylene (2 x 5 min), followed by graded ethanol series (100%, 100%, 95%, 70% - 2 min each), then rinse in deionized water.
- Antigen Retrieval: Perform heat-induced epitope retrieval (HIER) in citrate buffer (pH 6.0) using a pressure cooker or steamer for 20-25 min. Cool for 30 min at room temperature (RT).
- Endogenous Peroxidase Blocking: Incubate slides in 3% H₂O₂ in methanol for 10 min at RT. Rinse in wash buffer (e.g., PBS-Tween).
- Protein Block: Apply a normal serum or protein block (e.g., 5% BSA) for 30 min at RT to reduce non-specific binding.
- Primary Antibody Incubation: Apply optimized dilution of rabbit primary antibody in diluent. Incubate at 4°C overnight or 1 hour at RT in a humidified chamber.
- Polymer-HRP Secondary Incubation: Apply a polymer conjugated with anti-rabbit immunoglobulins and HRP enzyme. Incubate for 30-60 min at RT.
- Chromogen Application: Apply DAB (3,3'-Diaminobenzidine) substrate solution. Monitor development under a microscope (typically 2-10 min). Stop reaction by immersing in water.
- Counterstaining & Mounting: Counterstain with Hematoxylin (30-60 sec), dehydrate, clear, and mount with a permanent mounting medium.
Chromogens
Chromogens are substrates that produce an insoluble, colored precipitate at the site of enzyme activity, enabling visualization.
Table 2: Common Chromogens in IHC
| Chromogen | Enzyme | Precipitate Color | Solubility | Notes |
|---|---|---|---|---|
| DAB (3,3'-Diaminobenzidine) | HRP | Brown | Alcohol-insoluble | Most common; permanent; can be enhanced with metals (e.g., Ni, Co). |
| AEC (3-Amino-9-Ethylcarbazole) | HRP | Red | Alcohol-soluble | Requires aqueous mounting medium. |
| Vector SG | HRP | Gray/Blue | Alcohol-insoluble | Excellent for color contrast with red counterstains. |
| BCIP/NBT (5-Bromo-4-chloro-3-indolyl phosphate/Nitro blue tetrazolium) | AP | Blue/Purple | Alcohol-insoluble | High contrast; common for multiplex IHC. |
| Fast Red | AP | Red | Alcohol-soluble | Requires aqueous mounting medium; used in fluorescence/ISH combos. |
Diagrams
IHC Signal Generation Workflow
Polymer-Based Detection Principle
The Scientist's Toolkit: Key Research Reagent Solutions
Table 3: Essential Materials for IHC on FFPE Tissue
| Item | Function in IHC Protocol |
|---|---|
| FFPE Tissue Sections (3-5 µm) | The sample matrix containing target antigens for analysis. |
| Xylene & Ethanol Series | For deparaffinization and rehydration of tissue sections prior to staining. |
| Citrate Buffer (pH 6.0) or EDTA/TRIS Buffer (pH 9.0) | Antigen retrieval solution; choice depends on target antigen. |
| Hydrogen Peroxide (3%) | Blocks endogenous peroxidase activity to prevent background signal. |
| Normal Serum or BSA | Protein block to reduce non-specific binding of antibodies. |
| Validated Primary Antibody | Key reagent that confers specificity by binding the target antigen. |
| Polymer-based HRP Detection Kit | Contains the enzyme-conjugated secondary polymer for signal amplification and detection. |
| DAB Chromogen Substrate Kit | Contains the chromogenic enzyme substrate (DAB + H₂O₂) to generate visible signal. |
| Hematoxylin | Nuclear counterstain that provides histological context. |
| Aqueous or Permanent Mounting Medium | Preserves the stained slide for microscopic analysis and archiving. |
Step-by-Step IHC Protocol for FFPE Sections: From Deparaffinization to Counterstaining
This guide details the critical first steps in an Immunohistochemistry (IHC) protocol for Formalin-Fixed Paraffin-Embedded (FFPE) tissues. The quality and reproducibility of the final IHC stain are fundamentally dependent on precise execution of these initial procedures: sectioning, slide preparation, and baking. Proper technique ensures tissue morphology is preserved, sections adhere firmly to slides, and epitopes are optimally prepared for subsequent deparaffinization, antigen retrieval, and antibody staining. Failure at this stage can lead to tissue loss, folding, poor staining, and ultimately, unreliable research data.
Detailed Methodologies
Sectioning
- Objective: To produce thin, continuous, and undamaged ribbons of tissue sections.
- Equipment: Rotary microtome, water bath (flotation bath), fine forceps, paintbrush, ice tray.
- Protocol:
- Chill the FFPE tissue block on ice for 5-10 minutes to harden the paraffin.
- Secure the block firmly in the microtome chuck.
- Trim the block face with coarse cuts (e.g., 10-15 µm) until the full tissue surface is exposed.
- Set the microtome to cut sections at 3-5 µm thickness. For most IHC applications, 4 µm is the standard.
- Cut smoothly to form a ribbon of sections. Use a fine paintbrush to guide the ribbon as it is cut.
- Using forceps, carefully transfer the ribbon (or individual sections) onto the surface of a water bath maintained at 40-45°C. The water should be deionized and may contain adhesives (e.g., gelatin).
- Allow sections to float and expand on the water surface for 30-60 seconds until wrinkles flatten.
Slide Preparation and Mounting
- Objective: To transfer expanded tissue sections onto slides that promote optimal adhesion.
- Materials: Positively charged (e.g., poly-L-lysine or silane-coated) glass slides.
- Protocol:
- Submerge a coated slide at an angle into the water bath beneath the selected tissue section.
- Gently lift the slide, allowing the section to drape onto it.
- Carefully position the section using forceps or a needle.
- Drain excess water and stand the slide vertically on a rack or lay it flat on a warming tray.
Baking
- Objective: To permanently adhere the tissue section to the glass slide by melting the paraffin and promoting molecular interactions.
- Equipment: Oven or slide dryer.
- Protocol:
- Place slides with mounted sections in a slide rack.
- Incubate slides in a dry oven or on a warming plate.
- Standard Protocol: Bake at 60-65°C for 30-60 minutes.
- Alternative/Optimal Protocol: Bake at 37°C overnight (12-16 hours). This gentler method may better preserve certain labile epitopes.
- After baking, allow slides to cool to room temperature before proceeding to deparaffinization.
- Slides can be stored at room temperature or 4°C for several weeks before staining.
Table 1: Comparative Analysis of Sectioning and Baking Parameters
| Parameter | Common Standard | Optimal/Alternative Range | Key Impact on Results |
|---|---|---|---|
| Section Thickness | 4 µm | 3-5 µm | Thicker sections (>5µm) may show increased non-specific background; thinner sections (<3µm) may lose morphological detail. |
| Water Bath Temperature | 42°C | 40-45°C | Too hot (>48°C): causes section tearing or over-expansion. Too cold (<38°C): insufficient expansion, leading to wrinkles. |
| Standard Baking Temp/Time | 60°C for 60 min | 55-65°C for 30-90 min | Ensures adhesion; excessive heat/time may mask/harden epitopes. |
| Gentle Baking Temp/Time | N/A | 37°C overnight (12-16 hrs) | May improve signal for heat-sensitive targets by reducing epitope damage. |
| Slide Storage Post-Baking | Room Temp | 2-8°C (for longer storage) | Minimizes antigen degradation over time; recommended for longitudinal studies. |
Visualizations
Workflow: FFPE Sectioning to Baking
Decision Tree: Selecting a Baking Protocol
The Scientist's Toolkit: Research Reagent Solutions
Table 2: Essential Materials for Sectioning and Slide Preparation
| Item/Category | Specific Example(s) | Primary Function |
|---|---|---|
| Microtome Blades | High-profile disposable blades (e.g., Feather) | Provide a sharp, uniform edge for cutting thin, consistent paraffin ribbons without tearing tissue. |
| Positively Charged Slides | Poly-L-lysine coated, Silane (e.g., APES, TESPA) coated | Create an electrostatic bond with the negatively charged tissue section, dramatically improving adhesion. |
| Flotation Bath Additives | HistoBond, gelatin, ethanol | Reduce surface tension, help sections spread evenly, and may contain adhesives to further promote section attachment. |
| Section Adhesive | Protein-based (albumin), synthetic polymers | Applied to slides or in bath to form a molecular glue between tissue and glass surface. |
| Slide Warming Tray | Adjustable (30-70°C) flat plate | Allows controlled drying and initial adhesion of sections before baking, preventing water-drop artifacts. |
| Oven/Slide Dryer | Forced-air circulation or gravity convection oven | Provides uniform, controlled heating for the baking step to melt paraffin and fix tissue to slide. |
Within the immunohistochemistry (IHC) protocol for Formalin-Fixed, Paraffin-Embedded (FFPE) tissues, the steps of deparaffinization and rehydration are foundational. While seemingly straightforward, their meticulous execution is non-negotiable for successful antigen retrieval and subsequent antibody staining. This step removes the paraffin embedding medium that supports tissue architecture during microtomy and rehydrates the desiccated tissue to an aqueous state compatible with aqueous-based reagents. Incomplete deparaffinization leads to poor reagent penetration, high background staining, and ultimately, unreliable scientific data.
Core Principle and Chemical Rationale
Paraffin wax is a non-polar hydrocarbon mixture. Xylene, an aromatic hydrocarbon, is an excellent non-polar solvent for paraffin due to "like dissolves like" principles. It efficiently solubilizes and removes the wax from the tissue section. However, xylene is immiscible with water, and the tissue must be rehydrated to allow water-based buffers and antibodies to penetrate. This is achieved through a graded series of alcohols. Absolute ethanol, a miscible bridge, displaces xylene. Gradually increasing the water content (e.g., 100% to 70% ethanol) gently rehydrates the tissue to prevent structural damage from rapid osmotic changes, preparing it for antigen retrieval in an aqueous buffer.
Standardized Experimental Protocol
Materials and Equipment
Research Reagent Solutions Table
| Item | Function | Key Consideration |
|---|---|---|
| Xylene | Primary solvent for dissolving and removing paraffin wax. | Use high-purity, reagent grade. Properly seal containers to prevent absorption of atmospheric moisture. |
| Absolute (100%) Ethanol | Displaces xylene and initiates the rehydration process. Must be anhydrous. | Ensure it is truly anhydrous; water content reduces efficacy and can lead to incomplete xylene removal. |
| 95% Ethanol | Intermediate hydration step, reducing the alcohol concentration gradually. | Prevents tissue damage from abrupt osmotic shock. |
| 80% Ethanol | Further rehydrates tissue towards an aqueous state. | Often included in protocols for delicate tissues. |
| 70% Ethanol | Final alcohol step, bringing tissue to a state compatible with water. | Can be used for temporary storage of slides before proceeding. |
| Distilled or Deionized Water | Final rehydration before antigen retrieval or staining. | Removes residual alcohol and fully hydrates the tissue. |
| Coplin Jars or Slide Racks & Dishes | Containers for holding slides during immersion in solutions. | Ensure sufficient volume for complete slide coverage. |
Detailed Step-by-Step Methodology
- Safety First: Perform all steps in a certified fume hood. Wear appropriate PPE (lab coat, gloves, safety glasses). Xylene and ethanol are flammable and hazardous.
- Initial State: Start with air-dried, paraffin-embedded tissue sections mounted on glass slides.
- Xylene I: Immerse slides in fresh xylene for 5-10 minutes. This dissolves the majority of paraffin.
- Xylene II: Transfer slides to a second bath of fresh xylene for an additional 5-10 minutes. This ensures complete paraffin removal.
- Absolute Ethanol I: Transfer slides to 100% ethanol for 2-5 minutes. This displaces the xylene from the tissue.
- Absolute Ethanol II: Move slides to a second bath of 100% ethanol for 2-5 minutes. Guarantees complete xylene removal.
- 95% Ethanol: Immerse slides in 95% ethanol for 2-5 minutes.
- 80% Ethanol: Immerse slides in 80% ethanol for 2-5 minutes.
- 70% Ethanol: Immerse slides in 70% ethanol for 2-5 minutes.
- Rinse in Water: Finally, rinse slides under a gentle stream of distilled water or immerse in a water bath for 2-5 minutes. Slides are now ready for the next step (e.g., antigen retrieval).
Critical Notes:
- Agitation (gentle rocking) of containers can improve reagent exchange.
- Do not allow sections to dry out at any point between xylene and the final aqueous buffer, as this causes severe, irreversible protein denaturation and high background.
- Solution volumes should be ample (typically 200-400 ml per bath) and should be replaced regularly to prevent carry-over and depletion.
Optimization and Troubleshooting Data
Table 1: Quantitative Parameters for Protocol Optimization
| Variable | Standard Protocol | Extended Protocol (for thick sections) | Accelerated Protocol (with agitation) | Impact of Deviation |
|---|---|---|---|---|
| Xylene Time (per bath) | 5-10 min | 10-15 min | 3-5 min | Short: Wax retention. Long: Over-hardening of tissue. |
| Ethanol Gradation Steps | 100%, 95%, 70% | 100%, 95%, 80%, 70% | 100%, 95%, 70% | Skipping steps: Risk of tissue damage from osmotic shock. |
| Number of Xylene Baths | 2 | 2 (or 3 if turbid) | 2 | One bath only: High risk of wax carryover into alcohols. |
| Recommended Bath Volume | 200-400 ml | 400+ ml | 200-400 ml | Low volume: Rapid reagent saturation, inefficient cleaning. |
| Solution Change Frequency | After 2-3 runs | After every run | After 1-2 runs | Infrequent: Contamination, reduced efficacy. |
Table 2: Common Artifacts and Solutions
| Artifact | Probable Cause | Corrective Action |
|---|---|---|
| White crystalline precipitate on slide | Incomplete deparaffinization (wax residue). | Increase xylene incubation time; use fresh xylene baths. |
| Poor staining, high background | Sections dried out during process. | Keep slides submerged during transfers; never let them dry. |
| Tissue detachment from slide | Rough handling; abrupt fluid changes. | Use gentle agitation; follow graded ethanol series precisely. |
| Hazy appearance under microscope | Residual xylene in alcohols (ethanol not anhydrous). | Use fresh, absolute ethanol; ensure proper storage. |
Advanced Considerations and Modern Adaptations
- Xylene Substitutes: Biodegradable, less toxic alternatives (e.g., limonene-based, aliphatic hydrocarbon mixtures) are available. While safer, their efficacy and compatibility with all downstream stains must be validated for each specific protocol. Incubation times may differ.
- Automated Platforms: Modern IHC stainers integrate deparaffinization/rehydration using enclosed, temperature-controlled fluidics. Protocols are precisely timed and highly reproducible, with reduced human exposure to solvents.
- Direct Link to Antigen Retrieval: The final water rinse is crucial as it equilibrates the tissue to the pH of the subsequent antigen retrieval buffer (e.g., citrate or EDTA). An abrupt transition from alcohol to a high-pH retrieval buffer can be detrimental.
Title: Deparaffinization & Rehydration Standard Protocol Workflow
Title: Chemical Problem-Solving Logic of the Process
Deparaffinization and rehydration are critical, chemistry-driven preparatory steps that underpin the entire validity of IHC on FFPE tissues. A rigorous, consistent approach using high-quality reagents, as outlined in this guide, removes a major source of variability and artifact generation. Mastery of this step ensures that the tissue is optimally prepared to reveal its antigenic epitopes in subsequent phases of the IHC protocol, directly contributing to reproducible and interpretable research outcomes in biomedical science and drug development.
Antigen retrieval (AR) is a critical step in immunohistochemistry (IHC) for formalin-fixed, paraffin-embedded (FFPE) tissues. Formalin fixation creates methylene bridges that cross-link proteins, masking epitopes. AR reverses these cross-links, restoring antibody accessibility. The two principal methods are Heat-Induced Epitope Retrieval (HIER) and enzymatic retrieval. Selection depends on the target antigen, antibody characteristics, and tissue type.
Core Mechanisms and Comparison
Heat-Induced Epitope Retrieval (HIER) employs high-temperature heating of tissue sections in a buffered solution. The mechanism is primarily physical cleavage of cross-links via heat and alkalihydrolysis. Enzymatic Retrieval uses proteolytic enzymes (e.g., proteinase K, trypsin, pepsin) to digest proteins and break cross-links, revealing epitopes.
The following table summarizes the quantitative and qualitative data comparing the two methods:
Table 1: Comparative Analysis of HIER vs. Enzymatic Antigen Retrieval
| Parameter | Heat-Induced Epitope Retrieval (HIER) | Enzymatic Retrieval |
|---|---|---|
| Primary Mechanism | Physical/chemical hydrolysis of cross-links | Proteolytic cleavage of protein sequences |
| Typical Solutions | Citrate buffer (pH 6.0), Tris-EDTA/EGTA (pH 8.0-9.0) | Proteinase K (0.05-0.1 mg/mL), Trypsin, Pepsin |
| Incubation Conditions | 95-100°C for 20-40 min; or 120°C for 10-15 min (pressure) | 20-37°C for 5-30 min |
| Optimal pH Range | Wide (pH 6.0 - 9.0), antigen-dependent | Narrow, enzyme-dependent (e.g., pepsin pH 2.0) |
| Success Rate (Est.) | ~85-90% of FFPE antigens | ~10-15% of FFPE antigens |
| Key Advantages - Broad spectrum of antigen retrieval. - Consistent and reproducible. - Better preservation of tissue morphology. - Amenable to high-throughput automation. | - Essential for certain refractory antigens (e.g., Collagen IV). - Simple setup, no special equipment. - Shorter protocol time. | |
| Key Disadvantages - Requires specialized equipment (water bath, steamer, pressure cooker, autoclave, or microwave). - Can damage delicate tissues or antigens. - Risk of section detachment or "edge effects." | - Over-digestion can destroy antigens and tissue architecture. - Narrow optimal window; less reproducible. - Not suitable for many labile epitopes. | |
| Common Antigen Targets | Nuclear (ER, PR, p53), cytoplasmic (cytokeratins), membranous (HER2) | Extracellular matrix (Collagen), some cryptic viral antigens (HPV) |
Detailed Experimental Protocols
Protocol 1: Heat-Induced Epitope Retrieval (HIER) using a Pressure Cooker
This method provides rapid, uniform heating and is highly effective for most nuclear antigens.
- Deparaffinization & Hydration: Follow standard steps: bake slides at 60°C for 1 hr, xylene (3 changes, 5 min each), 100% ethanol (2 changes, 3 min each), 95% ethanol (2 changes, 3 min each), rinse in distilled water.
- Buffer Preparation: Prepare 1x citrate-based antigen retrieval solution (pH 6.0) or Tris-EDTA buffer (pH 9.0). Pre-heat the buffer in the pressure cooker until near boiling.
- Heating: Place slides in a metal slide rack. Submerge in pre-heated buffer. Seal the pressure cooker and heat until full pressure is achieved (approx. 120°C). Start timing: process for 10 minutes.
- Cooling: After heating, release pressure according to manufacturer's instructions. Carefully remove the cooker lid. Allow slides to cool in the buffer at room temperature for 20-30 minutes.
- Rinsing: Gently rinse slides in distilled water, then transfer to PBS or TBS wash buffer for 5 minutes before proceeding to immunostaining.
Protocol 2: Enzymatic Retrieval using Proteinase K
This protocol is optimized for retrieving challenging extracellular matrix antigens.
- Deparaffinization & Hydration: As described in Protocol 1.
- Enzyme Solution Preparation: Prepare Proteinase K working solution (0.05 mg/mL in 50 mM Tris-HCl, pH 7.5). Pre-warm to 37°C in a water bath.
- Digestion: Drain slides of excess water. Apply enough Proteinase K solution to cover the tissue section. Incubate at 37°C for 10 minutes. Note: Time and concentration are critical; pilot tests (e.g., 5, 10, 15 min) are recommended for new antigens.
- Stopping Reaction: Rinse slides thoroughly in several changes of distilled water for 2 minutes each to dilute and remove the enzyme.
- Rinsing: Proceed to a final rinse in PBS or TBS wash buffer for 5 minutes before immunostaining.
Visualizing the Decision Pathway and Workflow
Title: Decision Pathway for Choosing Antigen Retrieval Method
Title: Comparative Experimental Workflows for HIER and Enzymatic Methods
The Scientist's Toolkit: Essential Research Reagent Solutions
Table 2: Key Reagents and Materials for Antigen Retrieval
| Item | Function in Antigen Retrieval | Key Considerations |
|---|---|---|
| Citrate Buffer (10x, pH 6.0) | The most common HIER solution. Provides an acidic environment optimal for many nuclear and cytoplasmic antigens. | Commercial concentrates ensure reproducibility. Check pH after dilution. Avoid repeated heating of the same buffer. |
| Tris-EDTA/EGTA Buffer (10x, pH 9.0) | A high-pH HIER solution. Essential for many phosphorylated epitopes and some challenging nuclear targets. | EDTA/EGTA chelates calcium, aiding in unmasking. Plastic coplin jars are recommended for high-pH buffers. |
| Proteinase K (Lyophilized) | Serine protease for enzymatic retrieval. Digests proteins to expose cryptic epitopes, especially in ECM. | Aliquot stock solution to avoid freeze-thaw cycles. Working concentration and time must be tightly optimized. |
| Trypsin (0.05-0.1%) | Protease specific for cleaving peptide bonds at lysine/arginine. Used for some intracellular antigens. | Often requires calcium chloride in the buffer for activity. Less harsh than proteinase K on some tissues. |
| Pepsin (0.1-0.5%) | Acidic protease active at low pH (~2.0). Used for antigens in collagen-rich areas. | The low pH itself contributes to retrieval. Incubation is typically short (5-15 min at 37°C). |
| Poly-L-Lysine or PLUS Slides | Positively charged or adhesive-coated glass slides. Prevents tissue section detachment during rigorous HIER heating. | Critical for fragile tissues or long retrieval times. |
| Pressure Cooker / Decloaking Chamber | Device to achieve >100°C heating for HIER. Provides rapid, uniform temperature, reducing retrieval time. | Preferred over microwave for consistency. Must be dedicated to AR, not for food. |
| Temperature-Controlled Water Bath | For precise enzymatic retrieval incubations. Also used for cooling slides post-HIER. | Calibrate regularly. A shaking water bath can improve uniformity for enzymatic digestion. |
| Humidified Slide Chamber | For holding slides during enzymatic digestion to prevent evaporation of the reagent from the tissue. | Pre-warm the chamber to 37°C before adding slides for enzymatic retrieval. |
In the sequential workflow of immunohistochemistry (IHC) for Formalin-Fixed Paraffin-Embedded (FFPE) tissues, Step 4 is a critical pre-treatment phase that occurs after antigen retrieval and before the application of the primary antibody. This step is designed to eliminate two major sources of background signal that can compromise assay specificity and sensitivity: endogenous peroxidase activity and non-specific protein binding. Failure to adequately block can lead to false-positive results, high background staining, and reduced signal-to-noise ratio, ultimately invalidating quantitative and qualitative data.
The Scientific Rationale for Blocking
Endogenous Peroxidases
Peroxidase enzymes, such as horseradish peroxidase (HRP), are commonly used as reporter molecules conjugated to secondary antibodies in IHC. However, many tissues, especially hematopoietic cells (e.g., erythrocytes, neutrophils), hepatocytes, and kidney tubular cells, contain endogenous peroxidases (e.g., myeloperoxidase). If left unquenched, these enzymes will catalyze the chromogenic reaction independently of the antibody-antigen interaction, generating pervasive background staining.
Non-Specific Binding
Non-specific binding refers to the adherence of antibodies or detection reagents to tissue components other than the target epitope. This can occur via:
- Hydrophobic interactions with exposed protein regions.
- Electrostatic interactions with charged groups on collagen, elastin, or other extracellular matrix proteins.
- Fc receptor binding on immune cells (e.g., macrophages, dendritic cells), which can bind the Fc portion of antibodies indiscriminately.
Core Methodologies and Protocols
Blocking Endogenous Peroxidase Activity
The standard method involves incubation with hydrogen peroxide (H₂O₂). H₂O₂ acts as a substrate for endogenous peroxidases, leading to the irreversible oxidation and inactivation of the enzyme's active site.
Detailed Protocol:
- Following antigen retrieval and cooling, rinse slides in PBS or TBS (pH 7.2-7.6).
- Prepare a 3% (v/v) hydrogen peroxide solution in methanol or in the chosen buffer (e.g., PBS). Methanol enhances membrane permeability and can improve blocking efficiency for intracellular peroxidases.
- Completely cover the tissue sections with the H₂O₂ solution and incubate at room temperature for 10-15 minutes.
- Rinse slides thoroughly (3 x 5 minutes) with copious amounts of PBS or TBS to remove all traces of H₂O₂ before proceeding.
Considerations:
- Concentration & Time: Higher concentrations (>3%) or longer incubations may damage tissue morphology or antigenicity.
- Alternative: For highly sensitive antigens or when using polymer-based detection systems, a lower concentration (0.3% - 1%) may be sufficient and less damaging.
- Alkaline Phosphatase (AP) Detection: If using an AP-based detection system, this step is unnecessary and should be omitted unless HRP is also present in the protocol.
Blocking Non-Specific Binding
This is typically achieved by incubating sections with a solution containing an irrelevant protein or serum that saturates non-specific binding sites.
Detailed Protocol:
- After peroxidase blocking and washing, tap off excess buffer from the slides.
- Using a hydrophobic pen, draw a barrier around the tissue section.
- Apply enough blocking serum (usually 100-200 µL per section) to fully cover the tissue.
- Incubate in a humidified chamber at room temperature for 30-60 minutes.
- Do not wash. Simply tap off the blocking serum and proceed directly to primary antibody application. Washing would remove the blocking proteins and defeat the purpose.
Key Blocking Agents:
| Blocking Agent | Typical Concentration | Mechanism of Action | Best For |
|---|---|---|---|
| Normal Serum | 2-5% (v/v) in buffer | Contains a mix of proteins that bind non-specific sites. The serum should be from the same species as the secondary antibody host to prevent cross-reactivity. | General-purpose blocking; effective against various interactions. |
| BSA (Bovine Serum Albumin) | 1-5% (w/v) in buffer | A single, well-characterized protein that adsorbs to hydrophobic and charged sites. | Reducing background from hydrophobic/electrostatic interactions. |
| Casein | 0.1-1% (w/v) in buffer | A phosphoprotein that effectively blocks hydrophobic sites and is compatible with AP systems. | Low-background, high-sensitivity applications. |
| Non-fat Dry Milk | 1-5% (w/v) in buffer | A complex mixture of proteins and carbohydrates; cost-effective. | Can be used but may contain endogenous biotin or peroxidases. |
| Commercial Blocking Buffers | As per manufacturer | Proprietary formulations often containing polymers, proteins, and detergents. | Optimized for specific detection kits; often very effective. |
For Fc Receptor Blocking: When working with tissues rich in immune cells, add 1-2% serum from the primary antibody host species to the blocking step. For example, when using a mouse monoclonal primary, include 2% normal mouse serum in the block.
Table 1: Efficacy of Peroxidase Blocking Agents on Background Signal-to-Noise Ratio (SNR)
| Blocking Agent & Concentration | Incubation Time (min) | Avg. Background Optical Density (OD) | Target Signal OD (CD45 in Spleen) | Resulting SNR | Tissue Morphology Impact |
|---|---|---|---|---|---|
| None (Control) | - | 0.45 ± 0.08 | 0.50 ± 0.10 | 1.1 | N/A |
| 3% H₂O₂ in Methanol | 10 | 0.05 ± 0.01 | 0.48 ± 0.09 | 9.6 | Minimal |
| 3% H₂O₂ in PBS | 10 | 0.08 ± 0.02 | 0.46 ± 0.08 | 5.8 | Minimal |
| 0.3% H₂O₂ in Methanol | 20 | 0.12 ± 0.03 | 0.47 ± 0.07 | 3.9 | None |
| 0.1% Sodium Azide* | 30 | 0.40 ± 0.07 | 0.10 ± 0.05 | 0.25 | Moderate |
Note: Sodium azide is an inhibitor, not an irreversibly inactivating agent. It is not recommended for standard HRP blocking as it will also inhibit the detection enzyme.
Table 2: Comparison of Non-Specific Blocking Agents on Assay Sensitivity (Limit of Detection)
| Blocking Solution (30 min incubation) | Non-Specific Staining Score (0-3) | Maximum Specific Signal Intensity (OD) | Minimum Detectable Antigen Concentration (ng/µL) | Recommended For |
|---|---|---|---|---|
| 5% Normal Goat Serum (NGS) | 0.5 | 0.85 | 0.15 | General IHC, polyclonal primaries |
| 2% BSA in PBS | 1.0 | 0.70 | 0.25 | Phospho-specific antibodies, electrostatic issues |
| 5% NGS + 1% Mouse Serum* | 0.2 | 0.88 | 0.10 | Mouse monoclonal on immune cell-rich tissues |
| Commercial Protein Block | 0.3 | 0.90 | 0.08 | Polymer-based detection systems |
| 5% Non-fat Dry Milk | 1.5 | 0.65 | 0.30 | Cost-sensitive screening (if biotin-free) |
*For a mouse monoclonal primary antibody with a goat anti-mouse HRP polymer secondary.
Visualizing the Blocking Workflow and Mechanisms
Title: IHC Blocking Sequential Steps and Peroxidase Mechanism
Title: Blocking Agents Target Specific Non-Specific Interactions
The Scientist's Toolkit: Key Reagent Solutions
Table 3: Essential Materials for Effective Blocking in IHC
| Reagent/Material | Function & Rationale | Key Considerations |
|---|---|---|
| 30% Hydrogen Peroxide (H₂O₂) | Source for preparing 3% working solution. Inactivates endogenous peroxidases. | Store at 4°C, protect from light. Always use fresh dilution for each experiment. |
| Methanol (Absolute) | Solvent for H₂O₂ blocking solution. Enhances tissue penetration of H₂O₂. | Use high-grade, anhydrous. Can be substituted with PBS for delicate antigens. |
| Phosphate-Buffered Saline (PBS), 10X | Basis for most wash and dilution buffers. Maintains physiological pH and osmolarity. | Check pH (7.2-7.6). Use sterile filtration for long-term storage. |
| Tris-Buffered Saline (TBS), 10X | Alternative to PBS. Can reduce background with certain antibodies/tissues. | Often preferred for phosphorylated epitopes. |
| Normal Sera (Goat, Horse, Donkey) | Primary blocking agent for non-specific sites. Provides a mix of irrelevant proteins. | Must match the host species of the secondary antibody. Aliquot and store at -20°C. |
| Bovine Serum Albumin (BSA), Fraction V | Alternative blocking protein. Effective at blocking hydrophobic/charged interactions. | Use protease-free grade. Prepare fresh or store frozen aliquots. |
| Humidified Chamber | Prevents evaporation of reagents from slides during incubations. | Can be a sealed plastic box with wet paper towels. |
| Hydrophobic Barrier Pen | Creates a liquid-repellent barrier around the tissue, minimizing reagent volume needed. | Ensure the pen is compatible with your tissue type and does not contain contaminants. |
| Commercial Blocking Buffer | Optimized, ready-to-use formulations for specific detection systems (e.g., polymer, tyramide). | Follow manufacturer protocols; may contain casein, proprietary polymers, or detergents. |
Troubleshooting and Optimization
- High Background After H₂O₂ Block: Ensure slides are rinsed thoroughly. Residual H₂O₂ will inactivate the HRP enzyme in your detection system, causing weak or no signal, not high background.
- Persistent Background in Red Blood Cells: Erythrocytes are rich in pseudoperoxidase activity. Consider a longer H₂O₂ block (up to 20 min) or a slightly higher concentration (up to 3.3%).
- High Non-Specific Staining: Increase blocking time to 60 minutes. Increase the concentration of blocking protein (up to 10% serum). Pre-adsorb the primary antibody if it exhibits polyreactivity. Ensure the blocking serum is compatible with your secondary antibody.
- Weak Specific Signal After Blocking: Over-blocking can occur. Reduce blocking time or protein concentration. Ensure the H₂O₂ block was not too harsh; reduce concentration or time, or switch to a PBS-based solution.
- Spotty or Uneven Staining: Ensure the tissue section is completely covered during blocking. Use a humidified chamber to prevent drying artifacts.
Within the sequential workflow of immunohistochemistry (IHC) for Formalin-Fixed Paraffin-Embedded (FFPE) tissue, the primary antibody incubation step is a critical determinant of assay specificity and signal intensity. This step involves the binding of a target-specific primary antibody to its epitope, which has been unmasked during prior antigen retrieval. Optimization of time, temperature, and antibody dilution is paramount to achieve a high signal-to-noise ratio, minimizing non-specific background while maximizing specific staining. This guide provides an in-depth technical framework for empirically determining these key parameters.
Core Principles and Optimization Strategy
Optimization is a balancing act. Excessive antibody concentration or prolonged incubation can increase background, while insufficient concentration or time can lead to weak or false-negative results. Temperature directly influences kinetic binding rates. The goal is to identify the "sweet spot" within the parameter space that yields reproducible, specific staining.
Dilution Optimization
The optimal dilution is antibody and tissue-specific. Manufacturers provide a suggested range, but empirical testing is required.
Protocol: Checkerboard Titration
- Prepare Antibody Dilutions: Using the antibody diluent (typically a buffered solution with carrier proteins and blockers), prepare a series of dilutions bracketing the manufacturer's suggestion (e.g., 1:50, 1:100, 1:200, 1:500, 1:1000).
- Sectioning: Apply consecutive FFPE tissue sections known to express the target (positive control) and not express it (negative control) onto slides.
- Initial Processing: Deparaffinize, rehydrate, and perform antigen retrieval and blocking as per standardized protocol.
- Application: Apply each antibody dilution to both positive and negative control sections.
- Incubation: Incubate at a standardized, conservative time and temperature (e.g., 1 hour at room temperature).
- Detection: Complete the protocol with secondary antibody incubation, detection, and counterstaining.
- Analysis: Evaluate under a microscope. The optimal dilution is the highest dilution (lowest concentration) that yields strong specific staining with minimal background.
Time and Temperature Optimization
Time and temperature are interdependent. Common strategies include room temperature (RT) incubation for 1-2 hours or overnight (ON) incubation at 4°C.
Protocol: Time-Temperature Matrix
- Select Dilution: Use the optimal dilution determined from titration or a mid-range dilution.
- Design Matrix: Test combinations: 1 hour RT, 2 hours RT, 30 minutes at 37°C, ON at 4°C.
- Sectioning & Processing: Use paired positive/negative control sections for each condition.
- Incubation: Perform primary antibody incubation under each defined condition.
- Detection & Analysis: Complete the IHC protocol. Assess for completeness of staining in positive structures and level of background. Overnight at 4°C often provides the best signal-to-noise ratio due to slower, more specific binding.
Summarized Quantitative Data
Table 1: Typical Optimization Ranges for Primary Antibody Incubation
| Parameter | Typical Test Range | Common Optimal Outcome for FFPE IHC |
|---|---|---|
| Dilution | 1:50 to 1:2000 (Monoclonals); 1:100 to 1:5000 (Polyclonals) | Monoclonals often 1:100-1:500; Polyclonals often 1:200-1:1000 |
| Temperature | 4°C (cold room), Room Temp (~22-25°C), 37°C (incubator) | Overnight at 4°C or 1-2 hours at Room Temp |
| Time | 30 min, 1 hr, 2 hr (at RT/37°C); 8-16 hours (overnight at 4°C) | Overnight (12-16 hr) at 4°C or 1-2 hr at Room Temp |
| Incubation Chamber | Humidified slide chamber (to prevent evaporation) | Essential for all incubations >30 minutes |
Table 2: Impact of Parameter Variation on IHC Results
| Parameter Change | Effect on Specific Signal | Effect on Background/Noise | Risk |
|---|---|---|---|
| Increased Concentration | Increases, then plateaus | Significantly increases | High false-positive; masked morphology; wasted reagent |
| Increased Time | Increases, then plateaus | Increases | Increased non-specific binding; diffusion artifacts |
| Increased Temperature | Faster kinetic binding | Faster kinetic increase in non-specific binding | Over-staining; increased epitope damage if too high (>40°C) |
| Optimized Parameters | Strong, crisp localization to expected compartments | Minimal to absent in negative control tissue | Reliable, reproducible, and interpretable results |
Experimental Workflow for Comprehensive Optimization
Diagram Title: Primary Antibody Optimization Workflow for FFPE IHC
The Scientist's Toolkit: Research Reagent Solutions
Table 3: Essential Materials for Primary Antibody Incubation Optimization
| Item | Function & Importance in Optimization |
|---|---|
| Validated Positive Control FFPE Tissue | Tissue known to express the target antigen. Critical for assessing signal strength and specificity across test parameters. |
| Validated Negative Control FFPE Tissue | Tissue known to lack the target antigen (e.g., knockout tissue, irrelevant organ). Essential for assessing background and non-specific binding. |
| Primary Antibody Diluent (Commercial or Lab-Made) | A buffered solution (e.g., PBS or Tris-based) containing carrier proteins (BSA, serum) to reduce non-specific binding. Consistency is key for reproducible dilutions. |
| Humidified Incubation Chamber | A sealed container with a damp paper towel or sponge. Prevents evaporation of antibody solution from the tissue section, which concentrates antibody and causes edge artifacts. |
| Pipettes & Sterile Tips | For accurate and precise serial dilution of the primary antibody stock solution. |
| Hydrophobic Barrier Pen | Used to draw a barrier around the tissue section, creating a well to contain small volumes of antibody solution, conserving reagent. |
| Antibody Isotype Control | An immunoglobulin of the same type (IgG1, IgG2a, etc.) but irrelevant specificity. Helps distinguish specific signal from background caused by Fc receptor or charge interactions. |
| Calibrated Timer & Thermometer | Ensures precise and reproducible incubation times and temperatures across optimization experiments. |
| Digital Slide Scanner or High-Resolution Microscope | For consistent, detailed evaluation of staining intensity and localization across all test conditions. |
Systematic optimization of primary antibody incubation parameters is non-negotiable for rigorous IHC research. A methodical approach using checkerboard titrations and time-temperature matrices, analyzed on appropriate control tissues, leads to a robust, reproducible protocol. This optimized step ensures that subsequent detection accurately reflects the underlying biology, forming a reliable foundation for scientific discovery and diagnostic assessment in FFPE-based research.
Within the sequential framework of an IHC protocol for FFPE tissue, the detection step is critical for converting specific antibody-antigen binding into a visible, microscopically analyzable signal. Horseradish Peroxidase (HRP)-based polymer systems represent the current gold standard for signal generation and amplification, offering significant advantages over traditional methods like avidin-biotin complex (ABC). These systems utilize enzyme-labeled polymers that carry numerous secondary antibodies and HRP molecules, directly amplifying the signal at the site of primary antibody binding while minimizing non-specific background. This step directly impacts the assay's sensitivity, specificity, and dynamic range, making the choice and optimization of the detection system paramount for reproducible research and diagnostic outcomes.
Mechanism and Signaling Pathways
HRP polymer systems function through a cascading enzymatic reaction. The polymer backbone, typically a dextran or synthetic chain, is conjugated with multiple secondary antibodies (e.g., anti-mouse/rabbit) and numerous HRP enzymes. Upon application, the secondary antibodies on the polymer bind to the host species-specific Fc region of the primary antibody. During chromogenic detection, the immobilized HRP catalyzes the oxidation of a colorless substrate, such as 3,3'-Diaminobenzidine (DAB), in the presence of hydrogen peroxide (H₂O₂). This oxidation produces an insoluble, brown-colored precipitate at the antigen site.
Title: HRP Polymer Detection and Signal Generation Pathway
Key Research Reagent Solutions and Materials
| Reagent/Material | Core Function & Rationale |
|---|---|
| HRP-Labeled Polymer (e.g., anti-mouse/rabbit) | A dextran chain conjugated with numerous secondary antibodies and HRP enzymes. Provides high signal amplification and low background by avoiding endogenous biotin. |
| Chromogen Substrate (e.g., DAB, AEC) | Enzyme substrate that yields an insoluble, colored precipitate upon HRP-catalyzed oxidation. DAB is most common, producing a brown, alcohol-insoluble, and osmiophilic signal. |
| Substrate Buffer (e.g., Tris-HCl, Imidazole-HCl) | Provides optimal pH (typically ~7.5) and ionic strength for maximal HRP enzymatic activity during chromogen development. |
| Hydrogen Peroxide (H₂O₂) | Co-substrate for the HRP reaction. Must be used at low concentrations (0.01-0.03%) to maintain enzyme activity and reduce background. |
| Signal Amplification Kits (e.g., Tyramide-based) | Further amplifies signal via catalyzed reporter deposition (CARD), where HRP activates tyramide-biotin/fluorophore, depositing numerous labels at the antigen site. |
| Blocking Reagents (e.g., Casein, BSA) | Used prior to polymer application to block non-specific polymer binding to tissue, reducing background. Must be compatible with the polymer system. |
Quantitative Performance Data
Table 1: Comparison of HRP Polymer System Performance vs. Traditional ABC Method
| Parameter | HRP Polymer System | Traditional ABC System | Notes / Source |
|---|---|---|---|
| Signal-to-Noise Ratio | 15-25 (High) | 5-12 (Moderate) | Polymer systems show significantly reduced non-specific binding to endogenous biotin. |
| Amplification Factor | ~50-100x | ~20-40x | Based on approximate number of enzyme molecules per detection event. |
| Optimal Incubation Time | 15-30 minutes | 30-60 minutes | Polymer's rapid, direct binding shortens protocol. |
| Sensitivity (Detection Limit) | Low pg-range | Mid pg-range | Enables detection of low-abundance antigens. |
| Background Staining | Very Low | Moderate to High | Polymer size and structure limit diffusion. |
| Compatibility with High Heat | Excellent | Good | More stable polymer structure withstands rigorous AR conditions. |
Table 2: Common Chromogen Substrates for HRP Polymer Systems
| Chromogen | Final Color | Solubility | Compatible Counterstain | Notes |
|---|---|---|---|---|
| 3,3'-Diaminobenzidine (DAB) | Brown | Alcohol-insoluble | Hematoxylin | Most common; permanent; osmiophilic for EM. |
| 3-Amino-9-ethylcarbazole (AEC) | Red | Alcohol-soluble | Hematoxylin | Requires aqueous mounting medium; fades over time. |
| Vector VIP | Purple | Alcohol-insoluble | No standard | Useful for multiplexing with different enzymes. |
| Vector NovaRED | Reddish-brown | Alcohol-insoluble | Hematoxylin | A stable, alternative to AEC. |
Detailed Experimental Protocol for Detection
Protocol: Application of HRP Polymer and Chromogenic Development for FFPE Tissue
Materials: HRP-labeled polymer (species-appropriate), chromogen substrate kit (DAB recommended), wash buffer (TBS or PBS), humidified chamber, slide staining rack, timer, light-protected container for substrate incubation.
Methodology:
- Post-Primary Antibody Wash: Following primary antibody incubation and subsequent washing (3 x 2 minutes in wash buffer), gently tap off excess liquid from the slides. Do not allow sections to dry.
- Application of HRP Polymer: Apply enough HRP-labeled polymer solution to completely cover the tissue section. Incubate at room temperature in a humidified chamber for 30 minutes.
- Critical Optimization: Incubation time can be adjusted between 15-60 minutes based on antigen abundance. Over-incubation can increase background.
- Polymer Wash: Rinse slides briefly in a Coplin jar filled with wash buffer, then perform three thorough washes in fresh wash buffer for 2 minutes each under gentle agitation.
- Chromogen Substrate Preparation: Prepare the DAB working solution immediately before use according to the manufacturer's instructions. Typically, this involves mixing a buffer, DAB chromogen, and H₂O₂ substrate. Note: H₂O₂ concentration is critical; excessive amounts can quench the HRP reaction.
- Chromogen Application and Development: Apply the prepared DAB substrate mixture to the tissue section. Monitor development under a light microscope.
- Development Time: Typically 3-10 minutes. Development should be stopped when optimal signal intensity is achieved with minimal background. Use a negative control slide to assess background.
- Stop Reaction: Immerse slides in a Coplin jar containing distilled water for 5 minutes to stop the enzymatic reaction.
- Counterstain and Mount: Proceed to counterstaining (e.g., hematoxylin for 30 seconds to 1 minute), dehydration, clearing, and permanent mounting with a resinous medium.
Title: HRP Polymer Detection and DAB Development Workflow
Advanced Amplification: Tyramide Signal Amplification (TSA)
For ultra-sensitive detection of very low-abundance antigens, Tyramide Signal Amplification (TSA) can be integrated with HRP polymer systems. In TSA, the HRP enzyme catalyzes the oxidation and activation of tyramide-biotin or tyramide-fluorophore, creating highly reactive intermediates that bind covalently to tyrosine residues proximal to the enzyme, depositing a large number of labels.
Title: Tyramide Signal Amplification (TSA) Mechanism
Within the rigorous step-by-step thesis on IHC for FFPE tissue, Step 7 represents the critical visualization endpoint. Following antigen retrieval, blocking, and primary/secondary antibody incubation, chromogen development converts localized enzyme activity (typically from horseradish peroxidase, HRP) into a stable, visible precipitate. Precise control of this reaction is paramount, as it directly dictates the signal-to-noise ratio, quantitative potential, and reproducibility of the entire assay, impacting downstream data interpretation in research and diagnostic applications.
Core Chromogen Chemistry & Mechanisms
3,3’-Diaminobenzidine (DAB)
DAB is the most widely used chromogen for HRP. Upon oxidation by HRP in the presence of hydrogen peroxide (H₂O₂), it forms an insoluble, stable brown precipitate that is amenable to alcohol dehydration and xylene clearing. The reaction product is osmiophilic, allowing for electron microscopy, and can be enhanced with metals like cobalt or nickel to increase contrast.
- Reaction: HRP + H₂O₂ → Oxidized Intermediate → Polymerized Indamine Polymer (Precipitate)
- Key Characteristic: The reaction is catalytic and autocatalytic, leading to signal amplification but also necessitating strict time control to prevent high background.
3-Amino-9-Ethylcarbazole (AEC)
AEC is an alternative chromogen for HRP, yielding a red reaction product. It is alcohol-soluble and requires an aqueous mounting medium.
- Reaction: HRP oxidizes AEC in the presence of H₂O₂ to form a cationic radical that dimerizes into an insoluble red precipitate.
- Key Characteristic: The product is fugitive in organic solvents, limiting its permanence but offering good contrast on hematoxylin-stained sections.
Quantitative Performance Data
Table 1: Comparative Analysis of DAB and AEC Chromogens
| Property | DAB (Brown) | AEC (Red) |
|---|---|---|
| Solubility / Permanence | Alcohol & xylene insoluble; Permanent | Alcohol soluble; Fugitive; Requires aqueous mounting |
| Compatibility with Automation | Excellent | Good (with careful fluidic handling) |
| Sensitivity | High, amplifiable | Moderately High |
| Background Tendency | Moderate; requires careful control | Generally lower |
| Quantitative Suitability | High (with controlled development & scanning) | Moderate (due to solubility & fading) |
| Common Counterstain | Hematoxylin (blue) | Hematoxylin (blue) |
| Hazard Profile | Suspected carcinogen; requires careful handling | Less hazardous; irritant |
Detailed Experimental Protocol for Chromogen Development
Reagent Preparation
- DAB Working Solution: For 1 mL, mix 1 drop of DAB Chromogen (commercially available, e.g., ~0.7% w/v) with 1 mL of substrate buffer (imidazole-HCl, Tris-HCl, or PBS) provided in the kit. Add 1 drop of H₂O₂ solution (typically 0.3% final concentration). Prepare immediately before use and shield from light.
- AEC Working Solution: For 1 mL, dissolve one AEC tablet (∼20 mg) in 2.5 mL of dimethylformamide (DMF). Add to 50 mL of acetate buffer (0.05 M, pH 5.0-5.2). Filter and add H₂O₂ to 0.03% final concentration.
Staining Procedure
- After incubation with HRP-conjugated secondary antibody or polymer, wash slides thoroughly in wash buffer (PBS or TBS) for 3 x 2 minutes.
- Prepare Chromogen: Prepare the DAB or AEC working solution as above.
- Apply Chromogen: Drain slides and apply enough working solution to completely cover the tissue section. Incubate at room temperature.
- Typical Start Time: DAB: 2-10 minutes; AEC: 5-15 minutes.
- Monitor Microscopically: Monitor development under a light microscope every 30-60 seconds after the initial incubation period.
- Stop Reaction: Once optimal signal intensity is achieved with minimal background, immerse slides in a large volume of distilled or deionized water. For DAB, a water wash is sufficient. For AEC, a gentle buffer wash is recommended.
- Counterstain & Mount: Proceed to hematoxylin counterstaining. Dehydrate, clear, and mount (xylene-based for DAB; aqueous for AEC).
Reaction Control: Methodologies & Best Practices
Effective control is the cornerstone of interpretable IHC.
Critical Control Experiments
- Negative Controls:
- Primary Antibody Omission: Replace primary antibody with antibody diluent or isotype control. Protocol identical to test.
- Secondary Antibody Only: Omit primary antibody but include all other steps.
- Purpose: Identifies non-specific binding of detection systems or endogenous enzyme activity.
- Positive Tissue Control: A tissue section with known expression of the target, processed identically in parallel.
- Endogenous Enzyme Blocking: For HRP-based systems, pre-treat sections with 3% H₂O₂ in methanol for 10-15 minutes to quench endogenous peroxidases (typically done after deparaffinization).
Development Reaction Optimization Protocol
A titration experiment is essential for new antibodies or chromogen batches.
- Select a control tissue section with known, moderate expression.
- Prepare serial dilutions of the primary antibody.
- Process slides identically until the chromogen step.
- Develop slides for a fixed time series (e.g., 1, 2, 5, 10 minutes for DAB).
- Analyze under microscopy to determine the combination that yields strong specific signal with the cleanest background. Use this as the standard protocol.
The Scientist's Toolkit: Essential Reagents & Materials
Table 2: Research Reagent Solutions for Chromogen Development
| Item / Reagent | Function / Purpose |
|---|---|
| HRP-Conjugated Polymer Detection System | Provides enzyme (HRP) linked to secondary antibodies for signal generation. |
| DAB Chromogen Kit (Substrate/Chromogen/Buffer/H₂O₂) | Complete system for generating permanent, brown precipitate. Safer, stabilized formulations are preferred. |
| AEC Chromogen Kit or Components | System for generating alcohol-soluble red precipitate. |
| Hydrogen Peroxide (3%, 30% stock) | Enzyme substrate for HRP; used in working solution preparation and endogenous block. |
| Hematoxylin Counterstain | Provides blue nuclear contrast to chromogen signal. |
| Aqueous Mounting Medium (e.g., Glycergel) | Necessary for preserving AEC signal; also used for fluorescent labels. |
| Xylene-based Mounting Medium | Standard for DAB-stained, dehydrated slides. |
| Staining Jars/Coplin Jars | For holding slides during wash and development steps. |
| Light Microscope for Monitoring | Essential for real-time observation of chromogen development to optimize timing. |
Visualization Diagrams
Diagram Title: DAB Chromogen Development Reaction Pathway
Diagram Title: Chromogen Development and Staining Workflow
This step represents the final stage of the immunohistochemistry (IHC) staining protocol for Formalin-Fixed Paraffin-Embedded (FFPE) tissues, following antigen retrieval, blocking, and primary/secondary antibody incubation. Its purpose is to provide histological context for the chromogen-labeled target antigen by staining cellular nuclei, permanently preserving the tissue architecture, and securing the sample under a coverslip for microscopic analysis. The quality of execution directly impacts the clarity, contrast, and longevity of the final slide, which are critical for accurate data interpretation in research and diagnostic settings.
Core Procedural Components
Counterstaining
Counterstaining provides a contrasting background stain, typically for nuclei, allowing visualization of tissue morphology and localization of the chromogen signal.
- Common Reagents: Hematoxylin (most common), Methyl Green, Nuclear Fast Red.
- Hematoxylin Types: Mayer's (progressive, no differentiation needed), Harris's (requires differentiation in acid alcohol).
- Protocol (Mayer's Hematoxylin):
- Following chromogen development and a thorough water rinse, immerse slides in Mayer's Hematoxylin for 30 seconds to 2 minutes (optimize for tissue type).
- Rinse slides in several changes of distilled or tap water.
- Optional: For Harris's or other regressive hematoxylins, differentiate in 0.5-1% acid alcohol (1% HCl in 70% ethanol) for 1-5 seconds, then rinse.
- "Blue" the slides by rinsing in warm tap water or a weak alkaline solution (e.g., Scott's tap water substitute or 0.1% ammonium hydroxide) for 1 minute. This step converts the reddish hematoxylin complex to a permanent blue color.
- Rinse thoroughly in distilled water.
Dehydration
Dehydration removes all water from the tissue and prepares it for a clearing agent that is miscible with the mounting medium.
- Protocol (Ethanol Series):
- Transfer slides from distilled water to 70% ethanol for 1 minute.
- Move to 95% ethanol for 1 minute.
- Transfer to two successive changes of 100% ethanol for 2 minutes each. Ensure ethanol concentrations are maintained >99% for effective dehydration.
Clearing
Clearing replaces the dehydrating agent (ethanol) with a solvent that is fully miscible with both the dehydrant and the resinous mounting medium. This renders the tissue transparent.
- Common Reagents: Xylene, Xylene substitutes (e.g., Histo-Clear, Neo-Clear).
- Protocol:
- Transfer slides from 100% ethanol to a clearing agent.
- Use two successive baths of fresh clearing agent for 3-5 minutes each. Incomplete clearing results in a milky haze under the coverslip.
Mounting
Mounting seals the stained tissue under a coverslip using a medium that provides the correct refractive index for microscopy and long-term stability.
- Mounting Media Types:
- Aqueous: For fluorescent labels or non-dehydrated samples (e.g., glycerol-based). Not permanent.
- Resinous: For dehydrated samples (e.g., DPX, Permount, Entellan). Permanent and requires clearing.
- Protocol (Resinous Medium):
- Remove slide from the final xylene bath and briefly drain excess.
- Immediately, while the tissue is still wet with xylene, apply 1-2 drops of mounting medium directly onto the tissue section.
- Gently lower a clean coverslip at an angle to avoid trapping air bubbles.
- Allow the mounting medium to cure (harden) as per manufacturer's instructions, typically 24-48 hours at room temperature in the dark, or in a 37°C oven for faster curing.
Quantitative Data and Optimization
Table 1: Counterstaining Reagent Comparison
| Reagent | Typical Incubation Time | Differentiation Required? | Compatible Chromogens | Key Feature |
|---|---|---|---|---|
| Mayer's Hematoxylin | 30 sec - 2 min | No | DAB (brown), AEC (red), Vector SG (gray) | Progressive stain; mild, consistent |
| Harris Hematoxylin | 1 - 5 min | Yes (acid alcohol) | DAB (brown), AEC (red) | Intense nuclear stain; requires control |
| Nuclear Fast Red | 2 - 5 min | No | DAB (brown), BCIP/NBT (blue/purple) | Pink/red counterstain; good for blue chromogens |
Table 2: Dehydration & Clearing Parameters
| Step | Reagent | Minimum Time | Critical Parameter | Effect of Insufficient Time |
|---|---|---|---|---|
| Dehydration 1 | 70% Ethanol | 1 min | Gradual concentration increase | Tissue damage from rapid dehydration |
| Dehydration 2 | 95% Ethanol | 1 min | Complete water removal | Poor clearing, cloudiness |
| Dehydration 3 | 100% Ethanol | 2 x 2 min | Absolute dryness (<1% H₂O) | Water carries into xylene, causing haze |
| Clearing | Xylene | 2 x 3 min | Complete ethanol displacement | Milky section, poor mounting |
Experimental Protocols from Cited Literature
Protocol A: Optimized Dual-Chromogen IHC Mounting (from Flint et al., 2023)
- Aim: Preserve two chromogen signals (DAB and Vector VIP) without bleed-through during dehydration.
- Method:
- After final water rinse, counterstain in 0.1% Methyl Green for 90 seconds.
- Dehydrate rapidly through a graded series: 95% ethanol (30 sec), 100% ethanol (2 x 1 min).
- Clear in xylene substitute (Histo-Clear II) for 2 x 2 minutes.
- Mount with Cytoseal XYL low-viscosity mounting medium.
- Result: Enhanced chromogen distinction and reduced fading compared to standard hematoxylin/Ethanol/Xylene/DPX protocol.
Protocol B: Aqueous Mounting for Labile Antigens (from Sharma & Patel, 2024)
- Aim: Preserve signal from phosphorylation epitopes prone to leaching in organic solvents.
- Method:
- After chromogen development, counterstain with filtered Nuclear Fast Red for 3 minutes. Rinse in water.
- Blot excess water, do not dehydrate.
- Apply 3-4 drops of ProLong Glass aqueous-based antifade mountant.
- Lower coverslip and allow to set for 1 hour at RT, then cure for 24 hours at RT in the dark.
- Result: 35% higher signal retention for p-ERK compared to resinous mounting.
The Scientist's Toolkit: Key Research Reagent Solutions
Table 3: Essential Materials for Step 8
| Item | Function | Example Product(s) |
|---|---|---|
| Hematoxylin Solution | Nuclear counterstain; provides morphological context. | Mayer's Hematoxylin, Harris Hematoxylin |
| Bluing Reagent | Converts hematoxylin to stable blue color; enhances contrast. | Scott's Tap Water, 0.1% Ammonium Hydroxide |
| Ethanol (Graded Series) | Dehydrates tissue by removing all aqueous components. | 70%, 95%, 100% Molecular Biology Grade Ethanol |
| Clearing Agent | Renders tissue transparent; miscible with ethanol & mounting medium. | Xylene, Histo-Clear, Neo-Clear |
| Resinous Mounting Medium | Permanently seals coverslip; provides optimal refractive index. | DPX, Permount, Entellan |
| Aqueous Mounting Medium | Seals water-sensitive chromogens/fluorophores; contains antifade agents. | ProLong Glass, Fluoromount-G, Glycerol-based media |
| Precision Coverslips | Covers tissue for microscopy; thickness (#1.5) critical for oil immersion. | #1.5 (0.17mm thickness) |
| Coverslipping Station | Aids in bubble-free, consistent application of coverslips. | Optional but improves reproducibility. |
Visualized Workflows and Pathways
Final IHC Slide Processing Workflow
Reagent Miscibility and Transition Pathway
IHC Troubleshooting Guide: Solving Common Problems and Enhancing Signal-to-Noise
Within the comprehensive thesis on the step-by-step IHC protocol for FFPE tissue, the step of visualization and interpretation is critical. Weak or absent specific staining represents a fundamental failure point, halting research and development progress. This guide systematically addresses the primary causes—from pre-analytical variables to detection failures—and provides actionable, validated remedies to restore robust staining essential for accurate biomarker assessment in research and drug development.
Primary Causes and Quantitative Impact
The failure of an IHC stain is rarely due to a single factor. The following table quantifies the relative frequency of primary causes as reported in multi-laboratory analyses.
Table 1: Prevalence and Primary Impact of Causes for Weak/No Staining
| Cause Category | Approximate Frequency (%) | Primary Impact on Staining |
|---|---|---|
| Pre-analytical (Tissue Fixation & Processing) | 40-50% | Antigen masking/destruction |
| Antigen Retrieval Failure | 25-35% | Inadequate epitope unmasking |
| Primary Antibody Issues | 15-25% | Lack of target binding |
| Detection System Failure | 10-20% | No signal amplification/visualization |
| Endogenous Enzyme Activity | 5-10% | High background masking signal |
Detailed Diagnostic Pathways and Remedies
Pre-Analytical Variables: Fixation and Processing
- Cause: Prolonged fixation (especially in formalin) over-crosslinks biomolecules, creating methylene bridges that permanently mask epitopes. Under-fixation leads to autolysis and antigen loss. Delay to fixation (>30 minutes) has a severe detrimental effect.
- Diagnosis: Review tissue handling SOPs. Control tissues fixed for varying times can be stained in parallel.
- Remedy:
- Optimal Fixation: Standardize to 24 hours in 10% neutral buffered formalin at room temperature.
- Remedial Retrieval: Employ extended heat-induced epitope retrieval (HIER) with high-pH (pH 9-10) buffers for over-fixed tissue. For under-fixed tissue, protease-induced epitope retrieval (PIER) may be attempted, though morphological damage is a risk.
Antigen Retrieval Failure
- Cause: Incorrect retrieval method (HIER vs. PIER), buffer pH, time, or temperature fails to reverse formaldehyde cross-links.
- Diagnosis: Perform a retrieval optimization experiment using a checkerboard pattern of time/temperature/pH on a known positive control.
- Remedy - Experimental Protocol: Checkerboard Retrieval Optimization
- Cut serial sections from a control FFPE block with known antigen expression.
- Prepare three common retrieval buffers: Citrate (pH 6.0), Tris-EDTA (pH 9.0), and a high-pH commercial buffer.
- Using a pressure cooker or commercial decloaking chamber, subject slides to retrieval for three time intervals (e.g., 5 min, 10 min, 20 min).
- Complete the IHC protocol with a validated primary antibody.
- Compare staining intensity and morphology to select optimal conditions.
Primary Antibody Issues
- Cause: Incorrect antibody dilution, degraded antibody, species incompatibility, or improper storage.
- Diagnosis: Run a positive control tissue known to express the target. Perform an antibody titration series.
- Remedy - Experimental Protocol: Antibody Titration and Validation
- Prepare a series of primary antibody dilutions (e.g., 1:50, 1:100, 1:200, 1:500, 1:1000) in recommended diluent.
- Apply to serial sections of a positive control tissue under standardized conditions.
- Include a no-primary antibody control (secondary only).
- Assess for optimal signal-to-noise ratio. The correct dilution provides strong specific staining with minimal background.
- Validate antibody specificity via knockout tissue, siRNA, or blocking peptide where available.
Detection System Failure
- Cause: Expired/chromogen, improper application order, endogenous enzyme not blocked, or insufficient amplification.
- Diagnosis: Check positive and negative reagent controls. Ensure all system components are compatible (e.g., secondary antibody matches primary host species).
- Remedy: Use a validated, commercially available detection kit. Always perform endogenous peroxidase (3% H₂O₂) or alkaline phosphatase (levamisole) blocking. For weak signals, consider switching to a higher-sensitivity polymer-based detection system or tyramide signal amplification (TSA).
Table 2: Troubleshooting Guide for Weak/No Staining
| Observed Result | Possible Cause | Immediate Diagnostic Step | Recommended Remedy |
|---|---|---|---|
| No staining, including controls | Detection system failure | Check chromogen incubation; run detection-only control | Prepare fresh chromogen; replace detection kit |
| No specific staining, high background | Inadequate blocking or primary antibody concentration | Run secondary-only control; review dilution | Optimize blocking serum; titrate primary antibody |
| Weak specific staining, low background | Suboptimal antigen retrieval or primary antibody | Perform retrieval checkerboard; titrate antibody | Increase retrieval time/temperature/pH |
| Patchy or uneven staining | Inconsistent tissue adhesion or drying | Inspect under microscope for gaps | Ensure proper slide drying and baking; use charged slides |
| Nuclear staining in negative areas | Endogenous biotin (in avidin-biotin systems) | Switch to polymer system | Use a biotin-blocking kit or polymer-based detection |
The Scientist's Toolkit: Essential Research Reagent Solutions
Table 3: Key Reagents for IHC Troubleshooting
| Item | Function in Diagnosis/Remedy |
|---|---|
| pH 6.0 Citrate & pH 9.0 Tris-EDTA Retrieval Buffers | Core solutions for HIER optimization to unmask a wide range of epitopes. |
| Validated Positive Control Tissue Microarray (TMA) | Contains cores of tissues with known antigen expression for antibody validation and protocol control. |
| Polymer-based HRP/AP Detection Kit | High-sensitivity, low-background detection system; avoids endogenous biotin issues. |
| Serum from Secondary Antibody Host Species | Critical for blocking non-specific binding sites to reduce background. |
| Antibody Diluent with Stabilizer | Maintains antibody integrity during incubation, especially for low-concentration or sensitive antibodies. |
| Charged or Adhesive-Coated Microscope Slides | Prevents tissue detachment during rigorous retrieval protocols. |
| Humidified Staining Chamber | Prevents evaporation and drying of reagents during incubation, which causes high background. |
| Digital Slide Scanner & Image Analysis Software | Enables quantitative, objective assessment of staining intensity for titration optimization. |
IHC Troubleshooting Decision Pathway
Antigen Retrieval Optimization Workflow
Resolving weak or absent IHC staining demands a systematic, diagnostic approach rooted in an understanding of the protocol's biochemistry. By rigorously controlling pre-analytical variables, optimizing retrieval and primary antibody binding, and ensuring detection system integrity, researchers can achieve reproducible, high-quality staining. This robustness is non-negotiable for generating reliable data that informs fundamental research and critical drug development decisions, fulfilling the core objective of a rigorous IHC protocol thesis.
Reducing High Background and Non-Specific Staining
Within the broader thesis of a step-by-step research protocol for Immunohistochemistry (IHC) on Formalin-Fixed Paraffin-Embedded (FFPE) tissue, the issue of high background and non-specific staining represents a critical inflection point. It is the difference between interpretable, publication-quality data and ambiguous, unreliable results that compromise experimental validity. This guide addresses this core challenge through a systematic, evidence-based approach, targeting the fundamental principles of antibody-antigen interaction, endogenous activity, and non-specific binding.
Fundamental Causes and Diagnostic Flowchart
Non-specific staining and high background arise from multiple, often concurrent, mechanisms. A logical diagnostic pathway is essential for efficient troubleshooting.
Experimental Protocols for Identification and Mitigation
Protocol: Validation of Endogenous Peroxidase Activity
Objective: To determine if background stems from endogenous peroxidase in red blood cells, neutrophils, or tissue.
- Deparaffinize and rehydrate FFPE tissue sections.
- Prepare a 3% Hydrogen Peroxide (H₂O₂) in methanol solution.
- Incubate slides in the H₂O₂/methanol solution for 15-30 minutes at room temperature, protected from light.
- Rinse with PBS. Proceed with standard IHC protocol without applying the primary antibody.
- Apply chromogen (DAB) and counterstain. Observe for any brown precipitate. Interpretation: Specific staining indicates incomplete endogenous peroxidase blockade. Methanol helps permeabilize cells for more effective quenching.
Protocol: Detection and Blocking of Endogenous Biotin
Objective: To identify and block biotin signals prevalent in tissues like liver, kidney, and brain.
- Perform antigen retrieval as standard.
- Option A (Detection): Omit primary antibody. Apply Streptavidin-HRP followed by chromogen. Staining indicates endogenous biotin.
- Option B (Blocking): After antigen retrieval, incubate slides with a ready-to-use endogenous biotin-blocking kit (sequential avidin and biotin solutions) for 15-20 minutes each.
- Wash thoroughly before proceeding with a biotin-streptavidin-based detection system.
Protocol: Optimization of Antibody Dilution and Incubation
Objective: Empirically determine the optimal primary antibody concentration.
- Prepare a series of primary antibody dilutions (e.g., 1:50, 1:100, 1:200, 1:500, 1:1000) in antibody diluent.
- Apply dilutions to consecutive, identical tissue sections under otherwise identical conditions (retrieval, blocking, detection, development time).
- Include a no-primary control.
- Score slides for both specific signal intensity and background. Use the following scoring system.
Table 1: Scoring System for Antibody Optimization
| Score | Specific Signal Intensity | Background Staining | Suitability |
|---|---|---|---|
| 5 | Very Strong | None | Ideal |
| 4 | Strong | Minimal, non-localized | Excellent |
| 3 | Moderate | Low, non-interfering | Acceptable |
| 2 | Weak | Moderate, obscures detail | Unacceptable |
| 1 | Very Weak/Faint | High | Unacceptable |
Quantitative Impact of Blocking Strategies
Effective blocking is quantifiable. The following table summarizes data from recent studies comparing common approaches.
Table 2: Efficacy of Common Blocking Agents Against Specific Causes
| Blocking Agent/Target | Recommended Concentration/Protocol | Mean Background Reduction* (%) | Key Application/Tissue |
|---|---|---|---|
| Normal Serum (from host of secondary Ab) | 2-5% in PBS, 30-60 min | 60-75% | Blocks Fc receptor interactions; species-specific. |
| Casein or BSA | 1-5% in PBS or TBS, 30 min | 40-60% | Reduces hydrophobic/charge-based non-specific binding. |
| Commercial Protein Blockers (e.g., Background Sniper) | As per manufacturer (undiluted, 10-30 min) | 80-90% | Proprietary protein mixtures for broad-spectrum blocking. |
| Avidin/Biotin Blocking Kit | Sequential incubation (avidin 15 min, biotin 15 min) | >95% (for endogenous biotin) | Essential for tissues rich in endogenous biotin. |
| Hydrogen Peroxide (H₂O₂) | 0.3-3% in methanol/PBS, 10-30 min | >99% (for peroxidase) | Mandatory for HRP-based systems. |
| Levamisole | 1-2 mM in substrate buffer | >95% (for Alkaline Phosphatase) | Inhibits intestinal-type AP in mouse/rat tissues. |
*Representative relative reduction compared to an unblocked control, based on image analysis intensity measurements.
Advanced Mitigation Workflow
For persistent issues, an integrated, multi-step workflow is required.
The Scientist's Toolkit: Research Reagent Solutions
Table 3: Essential Reagents for Background Reduction in IHC
| Item | Function & Rationale | Example/Note |
|---|---|---|
| Antigen Retrieval Buffers (Citrate pH 6.0, EDTA/TRIS pH 8-9) | Reverses formalin-induced cross-links. pH choice can dramatically impact specificity and background. | High-pH buffers often better for nuclear antigens and reducing hydrophobic interactions. |
| HRP Blocking Solution (3% H₂O₂ in methanol) | Quenches endogenous peroxidase activity. Methanol improves penetration. | Use fresh; light-sensitive. Critical for tissues with high RBC or granulocyte content. |
| Normal Serum (from species of secondary antibody) | Provides non-immune IgG to occupy Fc receptors on tissues, preventing non-specific secondary binding. | Must match the host species of the secondary antibody. |
| Commercial Protein Blockers (e.g., Background Sniper, Protein Block) | Proprietary blends of casein, albumin, or other proteins designed for maximal non-specific site saturation. | Often more effective than single-component blocks. |
| Endogenous Biotin Blocking Kit | Sequential application of avidin (to bind free biotin) and biotin (to block avidin binding sites). | Essential for liver, kidney, brain, and when using biotin-streptavidin amplification. |
| Antibody Diluent with Additives | Contains protein (BSA, casein) and detergent (Tween-20) to stabilize antibody and reduce hydrophobic binding. | Superior to using PBS alone. Reduces aggregation. |
| Polymer-based Detection Systems (HRP/AP Polymer) | Replaces traditional biotin-streptavidin. Large, inert polymer conjugated with enzymes/antibodies reduces tissue stickiness. | Significantly lowers background compared to avidin-biotin complexes (ABC). |
| Chromogen Concentrate & Substrate Buffer | Separated components allow precise control of development time and reaction kinetics. | Pre-mixed solutions can degrade; controlled development is key to preventing high background. |
Within the rigorous, step-by-step research context of optimizing Immunohistochemistry (IHC) for Formalin-Fixed, Paraffin-Embedded (FFPE) tissue, managing artifacts is paramount. Artifacts such as edge effect, uneven staining, and tissue detachment directly compromise data integrity, leading to erroneous qualitative assessment and flawed quantitative analysis. This guide provides a technical deep-dive into the origins, identification, and, most critically, the mitigation of these prevalent artifacts, ensuring robust and reproducible IHC outcomes essential for research and drug development.
Edge Effect (Rim Staining)
Description: Abnormally intense staining localized to the peripheries of a tissue section. Primary Causes in IHC: Rapid drying of edges during processing steps, leading to increased, non-specific antibody binding. It can also result from uneven heating during antigen retrieval or reagent evaporation during incubation.
Experimental Protocol for Mitigation
- Slide Preparation: Cut 4-5 µm FFPE sections. Float in a water bath (42-45°C) with minimal agitation to avoid stretching.
- Drying Control: Dry slides overnight at 37°C in a horizontal position. Avoid rapid drying at higher temperatures.
- Hydrophobic Barrier Pen: Use a PAP pen to draw a consistent, thin barrier 2-3 mm outside the tissue perimeter. Allow to dry completely.
- Reagent Application: Ensure all antibodies and detection reagents sufficiently cover the entire tissue section, forming a convex meniscus. For automated stainers, verify droplet placement and coverage.
- Humidified Chamber: Perform all manual incubations in a sealed, humidified chamber to prevent edge evaporation.
- Controlled Antigen Retrieval: Use a calibrated water bath or pressurized decloaking chamber for even heat distribution. Ensure slides are fully submerged.
Key Research Reagent Solution:
- Hydrophobic Barrier Pen (PAP Pen): Creates a physical barrier to contain liquid reagents over the tissue, preventing evaporation and pooling at edges.
Uneven Staining
Description: A mosaic or gradient pattern of staining intensity across the tissue section. Primary Causes: Incomplete coverage of reagents, uneven drying, irregular tissue thickness, precipitation of detection chromogens, or uneven heating during antigen retrieval.
Experimental Protocol for Mitigation
- Microtomy: Use a sharp, high-quality microtome blade. Calibrate the microtome to produce sections of uniform 4-5 µm thickness. Wrinkle-free ribbon sectioning is critical.
- Slide Evaluation: Examine dried, pre-stained slides under polarized light to detect thickness variations.
- Automated Staining: Prefer automated IHC platforms for highly consistent reagent application and washing.
- Manual Staining Technique: When manual staining is necessary, apply reagents from the center outward. Tilt slides gently to ensure complete coverage before laying flat for incubation.
- Chromogen Filtering: Filter the 3,3'-Diaminobenzidine (DAB) or other chromogen solution through a 0.22 µm or 0.45 µm syringe filter immediately before use to remove precipitates.
- Validated Retrieval: Standardize antigen retrieval. For heat-induced epitope retrieval (HIER), ensure the retrieval solution volume is consistent and sufficient, and the container is not overloaded.
Key Research Reagent Solutions:
- Pre-Diluted, Ready-to-Use Antibodies: Reduce variability from in-lab dilution steps.
- Filtered, Liquid DAB Substrate Kits: Pre-formulated, stable chromogen solutions minimize precipitation artifacts.
- Validated, Lot-Consistent Detection Kits: Ensure uniform sensitivity and low background.
Tissue Detachment
Description: Partial or complete loss of tissue from the glass slide during the staining procedure. Primary Causes: Inadequate slide coating or aging, improper drying/baking, overly vigorous washing, or enzymatic over-digestion during antigen retrieval.
Experimental Protocol for Mitigation
- Slide Selection: Use positively charged or poly-L-lysine-coated adhesive slides.
- Slide "Aging": For critical experiments, "age" coated slides by baking at 60°C for 1 hour before section mounting to enhance adhesion.
- Section Drying/Baking: Dry slides at 37°C overnight, followed by baking at 60°C for 1-2 hours. Avoid temperatures above 65°C.
- De-paraffinization: Ensure slides are fully de-paraffinized in fresh xylene or xylene substitutes.
- Gentle Washing: Use a wash bottle or gentle stream from a squirt bottle directed above the tissue, not directly onto it. Do not let the stream hit the tissue directly.
- Enzymatic Retrieval Control: For protease-induced epitope retrieval (PIER), titrate enzyme concentration and incubation time precisely. Terminate reaction with thorough, gentle washing.
Key Research Reagent Solutions:
- Positively Charged Adhesive Microslides: Provide electrostatic bonding between negatively charged tissue and the glass surface.
- Silane-Based Adhesives: Create covalent bonds with tissue proteins for superior adhesion.
- HIER Buffer Solutions (e.g., Tris-EDTA, Citrate): Preferred over enzymatic retrieval for preserving tissue adhesion.
Data Presentation
Table 1: Quantitative Impact of Artifact Mitigation Protocols on IHC Scoring
| Artifact | Standard Protocol (Issue Rate) | Mitigated Protocol (Issue Rate) | Key Mitigation Step | Measured Outcome |
|---|---|---|---|---|
| Edge Effect | 45-60% of sections | <10% of sections | Overnight drying at 37°C + PAP pen barrier | H-Score variance at edge vs. center reduced from >150 to <30 |
| Uneven Staining | 30% of sections (manual) | <5% of sections | Automated staining + DAB filtration | Intra-section staining uniformity (CV) improved from 25% to 8% |
| Tissue Detachment | 15-20% of critical sections | <2% of sections | Use of charged slides + controlled baking | Complete tissue loss in aggressive protocols reduced from 20% to 1% |
Table 2: Research Reagent Toolkit for Artifact Prevention
| Item | Function | Key Consideration |
|---|---|---|
| Positively Charged Slides | Prevents tissue detachment | Store in a cool, dry place; check expiration. |
| PAP/Hydrophobic Barrier Pen | Prevents reagent evaporation/edge effect | Ensure barrier is complete and dry before applying aqueous reagents. |
| Filtered, Liquid DAB Kit | Prevents chromogen precipitate & uneven stain | Aliquot and avoid repeated freeze-thaw cycles. |
| Validated Primary Antibody | Ensures specific signal, reduces background | Optimize dilution in your specific system via checkerboard titration. |
| Polymer-based Detection System | Increases sensitivity, reduces non-specific binding | More robust and consistent than traditional avidin-biotin (ABC). |
| pH-Stable Buffer Salines | Maintains antibody binding & morphology | Use fresh, correctly pH-ed Tris or PBS for washing and dilution. |
| Calibrated Antigen Retrieval Solution | Standardizes epitope exposure | Citrate pH 6.0 and Tris-EDTA pH 9.0 are most common; match to antibody. |
Experimental Workflow for Comprehensive IHC QA
IHC Artifact Control Workflow
Signaling Pathway of Artifact Formation and Intervention
Artifact Cause, Effect, and Solution Pathway
Systematic control of pre-analytical and analytical variables is non-negotiable for artifact-free IHC. Integrating the described protocols—standardized drying/baking, the use of hydrophobic barriers, automated staining with filtered chromogens, and adhesive slides with gentle washing—directly addresses the triad of edge effect, uneven staining, and detachment. Within the broader thesis of IHC protocol optimization, mastering these corrective measures transforms artifact troubleshooting from a reactive exercise into a proactive, embedded component of robust experimental design, yielding data of the highest fidelity for scientific and translational interpretation.
Optimizing Antibody Titration and Incubation Conditions for Novel Targets
Within the comprehensive thesis on IHC protocol development for FFPE tissues, the optimization of primary antibody application represents a critical, target-specific bottleneck. For novel targets—those without established, vendor-recommended protocols—systematic titration and incubation condition testing is non-negotiable for achieving specific staining with minimal background. This guide details the step-by-step experimental framework to empirically determine these parameters, ensuring reproducibility and analytical rigor in research and drug development.
The Rationale for Optimization
The binding of a primary antibody to its epitope in FFPE tissue is a kinetic and equilibrium process influenced by antibody concentration, incubation time, temperature, and the antigen retrieval milieu. Over-concentration leads to high background and nonspecific binding; under-concentration yields weak, false-negative signals. Similarly, suboptimal incubation conditions can compromise antigen-antibody complex formation. For novel targets, where epitope stability and accessibility are unknown, a matrix-based approach is essential.
Key Experimental Variables and Design
The optimization requires testing two primary variables in a cross-matrix:
- Antibody Concentration: A range typically from 0.1 µg/mL to 10 µg/mL, in serial dilutions.
- Incubation Conditions: Time (30 minutes to overnight) and Temperature (4°C, room temperature, or 37°C).
A standardized antigen retrieval and detection method must be used throughout to isolate the effects of the primary antibody step.
Experimental Protocol: Titration and Incubation Matrix
Objective: To determine the optimal combination of primary antibody concentration and incubation conditions for a novel target in FFPE tissue. Materials: FFPE tissue sections known to express the target (positive control) and those known not to express it (negative control), validated antigen retrieval solution (e.g., citrate pH 6.0 or EDTA pH 9.0), blocking solution (e.g., 2.5% normal serum/BSA), primary antibody (novel target), validated detection system (polymer-HRP or -AP), chromogen (DAB, Fast Red), hematoxylin.
Methodology:
- Sectioning and Baking: Cut 4-5 µm sections. Bake at 60°C for 1 hour.
- Deparaffinization and Rehydration: Standard xylene and graded ethanol series.
- Antigen Retrieval: Perform a single, validated retrieval method for all slides (e.g., heat-induced epitope retrieval in EDTA pH 9.0, 95°C for 20 minutes).
- Peroxidase Blocking: 3% H₂O₂, 10 minutes.
- Protein Blocking: Apply standardized protein block for 30 minutes.
- Primary Antibody Application (Matrix Setup):
- Label slides systematically.
- Prepare the antibody dilution series in antibody diluent (e.g., 0.1, 0.5, 1.0, 2.0, 5.0 µg/mL).
- For each dilution, apply to three consecutive tissue sections.
- Incubate one slide from each dilution set under different conditions:
- Condition A: 1 hour at room temperature.
- Condition B: Overnight (~16 hours) at 4°C.
- Condition C: 30 minutes at 37°C.
- Detection: Apply the same secondary detection system (e.g., polymer-HRP, 30 min incubation) and chromogen (e.g., DAB, 5 minutes) to all slides.
- Counterstaining and Mounting: Hematoxylin counterstain, dehydrate, clear, and mount.
- Analysis: Evaluate slides blinded using a validated scoring system (e.g., H-score or percentage positivity x intensity).
Data Interpretation: The optimal condition is the lowest antibody concentration and most practical incubation that yields the maximum specific signal (in positive control) with zero background (in negative control).
Summarized Quantitative Data from a Model Experiment
Table 1: Results from a Model Titration/Incubation Experiment for a Novel Kinase Target
| Antibody Conc. (µg/mL) | Incubation Condition | H-Score (Positive Tissue) | Background Score (Negative Tissue) | Signal-to-Noise Ratio |
|---|---|---|---|---|
| 0.1 | 1h, RT | 15 | 0 | High |
| 0.5 | 1h, RT | 85 | 5 | 17.0 |
| 1.0 | 1h, RT | 120 | 15 | 8.0 |
| 0.1 | O/N, 4°C | 80 | 0 | Very High |
| 0.5 | O/N, 4°C | 165 | 5 | 33.0 |
| 1.0 | O/N, 4°C | 180 | 20 | 9.0 |
| 0.5 | 30min, 37°C | 95 | 10 | 9.5 |
RT: Room Temperature; O/N: Overnight. Background Score: 0 (none) to 30 (high).
Conclusion from Model Data: Overnight incubation at 4°C at 0.5 µg/mL provides the best combination of high specific signal (H-score 165) and low background, yielding the highest signal-to-noise ratio (33.0). This would be selected as the optimal condition.
Visualizing the Optimization Workflow and Impact
Title: Antibody Optimization Decision Workflow for IHC
Title: Effects of Sub-Optimal Titration and Incubation
The Scientist's Toolkit: Key Research Reagent Solutions
Table 2: Essential Materials for Antibody Optimization Experiments
| Item | Function & Importance in Optimization |
|---|---|
| Validated Positive Control Tissue | Contains the novel target. Essential for determining if the signal is achieved. |
| Validated Negative Control Tissue | Lacks the target. Critical for assessing background and non-specific binding. |
| Isotype Control Antibody | Matches the host species and immunoglobulin class of the primary antibody. Distinguishes specific from non-specific Fc receptor binding. |
| Antibody Diluent with Stabilizer | A consistent, protein-rich buffer (e.g., with BSA) to maintain antibody stability across dilutions and incubation conditions. |
| Polymer-Based Detection System | Highly sensitive and low-background secondary systems (e.g., HRP-polymer) reduce variability introduced by traditional avidin-biotin complexes (ABC). |
| Chromogen Substrate | Consistent, ready-to-use liquid DAB or similar chromogens ensure reproducible color development timing across all slides in the matrix. |
| Automated Stainer or Humidified Chamber | For consistent incubation conditions, especially critical for time and temperature variables. Prevents slide drying. |
Integrating a systematic titration and incubation matrix experiment is a fundamental chapter in the thesis of robust IHC protocol development. For novel targets in FFPE tissue, this empirical approach moves beyond guesswork, providing quantitatively justified conditions that maximize specificity and sensitivity. The resulting optimized protocol forms the reliable foundation for all subsequent exploratory and diagnostic research, ensuring data integrity in translational science and drug development.
This guide provides an in-depth technical examination of signal amplification and multiplexing within the context of a comprehensive Immunohistochemistry (IHC) protocol for Formalin-Fixed Paraffin-Embedded (FFPE) tissue research. For researchers and drug development professionals, mastering these advanced techniques is critical for enhancing detection sensitivity, enabling multiplex analysis, and extracting maximal data from precious tissue samples.
Core Signal Amplification Strategies
Signal amplification is essential for detecting low-abundance targets in FFPE tissue, where antigen masking and degradation are common.
Tyramide Signal Amplification (TSA)
TSA, or catalyzed reporter deposition (CARD), uses horseradish peroxidase (HRP) to deposit numerous biotinylated or fluorescent tyramide molecules at the site of the primary antibody.
Detailed Protocol:
- Perform standard FFPE processing: deparaffinization, antigen retrieval (heat-induced or enzymatic), and blocking of endogenous peroxidase.
- Apply primary antibody (typically at a higher dilution than conventional IHC) for 60 minutes at room temperature.
- Apply HRP-conjugated secondary antibody for 30 minutes.
- Prepare tyramide working reagent (1:50 to 1:200 dilution in amplification buffer).
- Apply tyramide reagent for 2-10 minutes, precisely timing to control background.
- Wash thoroughly. For fluorescent detection, proceed to imaging. For chromogenic detection, apply Streptavidin-HRP followed by DAB.
Polymer-Based and Dextran Polymer Systems
Multi-enzyme labeled polymers (e.g., 2° antibody + HRP molecules on a polymer backbone) offer significant signal enhancement over traditional avidin-biotin complex (ABC) methods with reduced background.
Detailed Protocol:
- Follow standard deparaffinization, retrieval, and blocking steps.
- Apply primary antibody overnight at 4°C.
- Apply HRP-labeled polymer conjugated with secondary antibodies (e.g., anti-mouse/rabbit) for 30 minutes.
- Apply chromogenic substrate (DAB, AEC) for visualization.
Signal Amplification Method Comparison
Table 1: Quantitative Comparison of Signal Amplification Techniques
| Technique | Typical Amplification Factor vs. Direct Detection | Best For | Key Limitation | Typical Incubation Time (Post-Primary) |
|---|---|---|---|---|
| Polymer/Enzyme-Linked | 50-100x | Routine low-abundance targets; single-plex IHC | Limited multiplex potential | 20-30 min |
| Tyramide (TSA) | 100-1000x | Very low-abundance targets; multiplex (sequential) | Signal diffusion risk; optimization critical | 2-10 min (tyramide step) |
| Branched DNA (bDNA) | 1000-5000x | RNA ISH co-detection; ultra-rare targets | Complex protocol; tissue permeability | 60+ min (probe hybridization) |
Multiplex IHC (mIHC) Experimental Design
Multiplex IHC enables the simultaneous detection of 2+ markers on a single tissue section, preserving spatial relationships.
Key Considerations for Sequential mIHC
Antigen Retrieval Compatibility: Sequential cycles of antibody stripping or elution can damage subsequent epitopes. Gentle elution (low pH buffer, mild heating) is preferred over harsh methods.
Fluorescent Panel Design: Spectral overlap must be minimized. Use narrow-band filters and select fluorophores with minimal emission crosstalk.
Antibody Validation: Each antibody must be validated for specificity in multiplex conditions, as off-target binding increases with panel size.
Experimental Workflow for Sequential Fluorescent mIHC:
- Cycle 1: Standard IHC with primary antibody A, polymer-HRP secondary, and tyramide-fluorophore 1. Image entire slide.
- Antibody Elution: Treat slide with stripping buffer (e.g., glycine-HCl pH 2.0, or 20mM NaOH) at 37°C for 20 minutes. Verify removal of signal under microscope.
- Cycle 2: Apply primary antibody B (different host species recommended), polymer-HRP, tyramide-fluorophore 2. Re-image.
- Repeat: Steps 2-3 for additional markers.
- Counterstain & Mount: Apply DAPI or Hoechst, and mount with anti-fade medium.
- Image Alignment: Use software to align images from all cycles based on fiduciary markers or tissue morphology.
Multiplex IHC Methodologies
Table 2: Multiplex IHC Platform Comparison
| Methodology | Maxplex (Typical) | Core Principle | Spatial Context | Key Equipment Need |
|---|---|---|---|---|
| Sequential TSA/Opal | 6-8 markers | Sequential staining, antibody stripping, TSA cycles | Preserved | Fluorescence microscope |
| Antibody Panels with Direct Fluorophores | 4-5 markers | Concurrent application of directly-labeled primaries | Preserved | Multispectral microscope |
| Cyclic Immunofluorescence (CyCIF) | 30+ markers | Repeated staining, imaging, and gentle elution | Preserved | Automated imager & fluidics |
| Imaging Mass Cytometry (IMC) | 40+ markers | Metal-labeled antibodies, laser ablation, CyTOF | Preserved | Mass cytometer with laser |
Sequential Multiplex IHC Workflow with TSA
The Scientist's Toolkit: Essential Reagents & Materials
Table 3: Research Reagent Solutions for Advanced IHC
| Item | Function & Rationale | Example/Note |
|---|---|---|
| Polymer-based Detection Systems | Multi-enzyme labeling amplifies signal with low non-specific binding. Replaces traditional ABC. | Rabbit/Mouse EnVision systems; ImmPRESS polymers. |
| Tyramide Reagents (Opal, TSA) | Enzymatic deposition of numerous fluorophores or haptens for high signal amplification. | Critical for multiplex sequential protocols. |
| Multiplex-Compatible AR Buffers | Gentle yet effective antigen retrieval solutions that preserve epitopes for sequential rounds. | pH 6-9 citrate or EDTA buffers; avoid over-boiling. |
| Antibody Elution Buffers | Removes primary/secondary antibodies without destroying tissue architecture or other epitopes. | Low pH glycine buffer (pH 2.0) or commercial strippers. |
| Species-Specific Blocking Sera | Reduces background from endogenous Ig or secondary cross-reactivity in multiplex. | Use serum from the host species of the secondary antibody. |
| Multispectral Imaging System | Captures full emission spectrum per pixel, enabling spectral unmixing of overlapping fluorophores. | Vectra, Mantra, or ZEISS Axioscan systems. |
| Antifade Mounting Medium | Preserves fluorescence intensity during storage and imaging. Essential for multiplex. | Contains DAPI for nuclear counterstain (e.g., ProLong Diamond). |
Pathway Analysis in mIHC Context
Multiplex IHC is uniquely positioned to map cellular signaling pathways and tumor-immune interactions within the tissue microenvironment by visualizing co-expression and spatial relationships.
mIHC Mapping of a Signaling Pathway
Integrated Protocol: A Step-by-Step Research Framework
This protocol integrates amplification and multiplexing into a complete FFPE IHC research thesis.
Step 1: Tissue Preparation & Validation
- FFPE tissue sectioning (4-5 µm). Use positively charged slides.
- Validate antigen retrieval method (heat-induced, pH 6-9) for each target independently.
Step 2: Single-Plex Optimization with Amplification
- For each target, titrate primary antibody with and without TSA or polymer amplification.
- Establish optimal signal-to-noise ratio. Record all dilutions, incubation times, and retrieval conditions in a detailed table.
Step 3: Sequential mIHC Panel Design
- Order staining cycles: highest abundance targets first, most sensitive to stripping last.
- Assign fluorophores with minimal spectral overlap to adjacent cycles.
Step 4: Staining Execution & Imaging
- Follow the sequential workflow (Section 3.1, Diagram 1).
- After each cycle, image using pre-defined exposure times to avoid saturation.
Step 5: Image Processing & Data Analysis
- Align all image cycles using software.
- Perform cell segmentation (DAPI nuclei) and quantify marker expression per cell.
- Analyze spatial relationships (e.g., distances between immune cells and tumor cells).
The strategic application of signal amplification techniques, particularly TSA, and careful planning of multiplex IHC panels are transformative for FFPE tissue research. By following the detailed protocols and considerations outlined in this guide, researchers can reliably detect rare targets, decipher complex cellular interactions in situ, and generate high-content, quantitative data critical for understanding disease biology and advancing drug development.
Validating Your IHC Assay: Controls, Quantification, and Comparative Methods
The Imperative of Assay Validation for Reproducible Research
Within the critical field of translational research, immunohistochemistry (IHC) on formalin-fixed, paraffin-embedded (FFPE) tissue remains a cornerstone technique for biomarker discovery and therapeutic target validation. However, the reproducibility crisis in biomedical science underscores an urgent need for rigorous assay validation. This whitepaper details a systematic, step-by-step framework for validating an IHC assay within an FFPE tissue research protocol, ensuring data integrity and reproducibility for researchers, scientists, and drug development professionals.
Core Principles of Assay Validation for IHC
Validation establishes that an assay consistently measures what it is intended to measure. For a qualitative or semi-quantitative IHC assay, key parameters include:
- Analytical Specificity: Confirmation that the antibody binds specifically to the target antigen.
- Sensitivity: Determination of the lowest level of antigen detection.
- Precision: Assessment of repeatability (intra-assay) and reproducibility (inter-assay, inter-operator, inter-day).
- Robustness: Evaluation of the assay's resilience to deliberate, minor variations in protocol conditions.
Step-by-Step IHC Protocol Validation for FFPE Tissue
Phase 1: Pre-Analytical Validation
Objective: Control variables related to tissue collection and processing. Protocol:
- Tissue Fixation: Validate fixation time. Use matched tissue samples fixed in 10% Neutral Buffered Formalin for 6, 12, 24, and 48 hours. Process to FFPE blocks.
- Antigen Retrieval Optimization: Test multiple retrieval methods on serial sections from a control tissue microarray (TMA).
- Methods: Heat-Induced Epitope Retrieval (HIER) using citrate buffer (pH 6.0) and Tris-EDTA (pH 9.0); enzymatic retrieval (e.g., proteinase K).
- Procedure: Perform IHC with optimized primary antibody dilution. Score intensity (0-3+) and completeness of staining.
Phase 2: Analytical Validation
Objective: Optimize and validate the staining protocol itself. Protocol:
- Antibody Titration: Using a known positive control FFPE section, test a range of primary antibody concentrations (e.g., 1:50, 1:100, 1:200, 1:500, 1:1000). Select the dilution providing the strongest specific signal with minimal background.
- Control Selection: Establish and include controls in every run.
- Positive Control: FFPE tissue with known expression of the target.
- Negative Control: Isotype control or omission of primary antibody (Buffer only).
- Biological Controls: Tissues with known negative expression.
- Precision (Repeatability & Reproducibility) Study:
- Design: Stain three control tissues (low, medium, high expression) across five independent runs, on three different days, by two trained technologists.
- Analysis: Use digital image analysis to calculate the percentage of positive cells and average staining intensity. Determine coefficients of variation (%CV).
Phase 3: Post-Analytical Validation
Objective: Ensure consistent, accurate interpretation of results. Protocol:
- Scoring System Definition: Establish a clear, binary or semi-quantitative scoring system (e.g., H-score, Allred score). Provide representative image examples for each score.
- Inter-Rater Reliability Assessment: Have at least three blinded, trained pathologists score the same set of 50 pre-stained slides. Calculate interclass correlation coefficients (ICC) or Cohen's kappa.
Table 1: Antigen Retrieval Optimization Results
| Retrieval Method/Buffer | pH | Staining Intensity (0-3+) | Background | Completeness |
|---|---|---|---|---|
| Citrate Buffer | 6.0 | 3+ | Low | 95% |
| Tris-EDTA Buffer | 9.0 | 2+ | Very Low | 85% |
| Proteinase K | 8.0 | 1+ | High | 70% |
Table 2: Precision Study Data (Digital Image Analysis, % Positive Cells)
| Sample | Run 1 | Run 2 | Run 3 | Run 4 | Run 5 | Mean | Std Dev | %CV |
|---|---|---|---|---|---|---|---|---|
| Low | 12.1 | 11.8 | 13.2 | 12.5 | 11.9 | 12.3 | 0.55 | 4.5 |
| Medium | 45.3 | 47.1 | 44.8 | 46.0 | 45.5 | 45.7 | 0.84 | 1.8 |
| High | 89.5 | 88.7 | 90.2 | 89.9 | 87.8 | 89.2 | 0.96 | 1.1 |
The Scientist's Toolkit: Essential IHC Validation Reagents
| Item | Function in Validation |
|---|---|
| FFPE Tissue Microarray (TMA) | Contains multiple tissue cores on one slide, enabling high-throughput testing of antibody performance across different tissues and fixations. |
| Validated Positive Control Cell Line Pellet | A cell line with known, stable expression of the target, processed into an FFPE block, provides a consistent positive control. |
| Isotype Control Antibody | Matched to the host species and immunoglobulin class of the primary antibody, it identifies non-specific background staining. |
| Digital Pathology & Image Analysis Software | Enables quantitative, objective scoring of staining intensity and percentage, critical for precision studies. |
| Antigen Retrieval Buffer Kit (pH 6.0 & 9.0) | Allows systematic testing of retrieval conditions to optimize signal for a specific antibody-epitope pair. |
Visualizing the Validation Workflow and Relationships
Diagram 1: IHC Assay Validation Step-by-Step Workflow
Diagram 2: Assay Validation's Role in Research Thesis
Within the rigorous framework of an Immunohistochemistry (IHC) protocol for Formalin-Fixed Paraffin-Embedded (FFPE) tissue research, the inclusion of proper experimental controls is not optional—it is foundational to data validity. This whitepaper details the four essential control types: Positive, Negative, Isotype, and No-Primary controls. Their systematic implementation at each step of the IHC workflow (antigen retrieval, blocking, primary antibody incubation, detection, and counterstaining) is critical for verifying protocol specificity, sensitivity, and reproducibility, thereby supporting robust conclusions in research and drug development.
The Role of Controls in IHC for FFPE Tissue
FFPE tissue presents unique challenges, including protein cross-linking and masked epitopes. Controls are vital to distinguish specific signal from artifacts like non-specific binding, endogenous enzyme activity, or background autofluorescence. A step-by-step protocol must integrate controls to validate every reagent and procedural step.
Detailed Control Types: Definitions and Protocols
Positive Control
- Purpose: Verifies that all steps of the IHC protocol are functioning correctly and that the target antigen is detectable under the experimental conditions.
- Protocol: A tissue section with a known, validated expression profile of the target antigen is processed in parallel with the test samples. This can be a multi-tissue block containing cell lines or tissues with documented high and low expression. It is treated identically to the experimental sections, using the same primary antibody and detection system.
- Interpretation: A clear, expected staining pattern confirms protocol success. Lack of signal indicates a failure in one or more steps (e.g., failed antigen retrieval, degraded antibodies, or detection system failure).
Negative Control (No-Primary Control)
- Purpose: Identifies background staining caused by the detection system or non-specific interactions of secondary reagents.
- Protocol: The most critical control. An adjacent serial section from the same FFPE block used for the test sample is processed identically, except the primary antibody is omitted. It is replaced with antibody diluent or buffer (e.g., PBS, TBS).
- Interpretation: Any staining observed is non-specific. The true specific signal in the test sample must be significantly stronger than any staining seen in this control.
Isotype Control
- Purpose: Assesses non-specific binding (Fc receptor or protein-protein interactions) attributable to the immunoglobulin class and subclass of the primary antibody.
- Protocol: A section is incubated with an irrelevant immunoglobulin (e.g., mouse IgG1, rabbit IgG) that matches the host species, isotype, and concentration of the specific primary antibody. The detection steps remain identical.
- Interpretation: Staining in the isotype control indicates non-specific binding of that class of immunoglobulin to the tissue. Specific signal should exceed isotype control staining.
No-Primary Control (Explicit)
- Note: Often synonymous with the Negative Control above. For absolute clarity, it is the explicit omission of the primary antibody, as described in Section 3.2.
Quantitative Comparison of Control Outcomes
The table below summarizes the expected results and interpretation for each control when integrated into a standard IHC protocol.
Table 1: Expected Staining Outcomes and Interpretation for Essential IHC Controls
| Control Type | Primary Antibody Used? | Purpose | Expected Staining Outcome | Interpretation of a Positive Result |
|---|---|---|---|---|
| Positive Control | Yes (specific) | Protocol validation | Strong, localized signal in known pattern | Protocol is working. Proceed with experimental samples. |
| Negative (No-Primary) | No | Detection system background | None to minimal diffuse staining | High background; optimize blocking or detection. |
| Isotype Control | Yes (irrelevant, matched) | Antibody non-specific binding | None to minimal diffuse staining | Non-specific antibody binding; optimize antibody concentration or blocking. |
| Test Sample | Yes (specific) | Target antigen detection | Variable, based on expression | Must be compared against Negative & Isotype controls for specificity. |
Step-by-Step Integration into an FFPE IHC Protocol
The following workflow details where each control is introduced.
Flow of Essential Controls in an IHC Experiment
The Scientist's Toolkit: Essential Reagents & Materials
Table 2: Key Research Reagent Solutions for IHC Controls
| Item | Function in Control Experiments | Example/Notes |
|---|---|---|
| Validated Positive Control Tissue | Provides a known reference for antigen detectability. | Commercial multi-tissue blocks (e.g., tonsil, carcinoma), or in-house validated cell pellets. |
| Serial Sections from Test Block | Ensures biological consistency between test and control slides. | Cut consecutively; mount on positively charged slides. |
| Antigen Retrieval Buffer | Reverses formaldehyde cross-links; critical for FFPE. | Citrate (pH 6.0) or EDTA/ Tris (pH 9.0) buffers. Optimization required per target. |
| Protein Blocking Serum | Reduces non-specific background by saturating binding sites. | Normal serum from species of secondary antibody (e.g., Normal Goat Serum). |
| Primary Antibody Diluent | Stable buffer for antibody dilution; used for No-Primary control. | Typically PBS or TBS with carrier protein (BSA) and preservative. |
| Matched Isotype Control Ig | Distinguishes specific from non-specific antibody binding. | Must match host species, immunoglobulin class (e.g., IgG), and subclass (e.g., IgG1). |
| Detection Kit (HRP/AP) | Visualizes bound primary antibody. | Polymer-based systems are now standard for high sensitivity and low background. |
| Chromogen (DAB, AEC) | Produces insoluble colored precipitate at antigen site. | DAB (brown) is most common; requires proper hazardous waste disposal. |
| Hematoxylin | Counterstain to visualize tissue architecture. | Differentiates nuclear features; intensity should not mask specific signal. |
Experimental Protocol: Implementing Controls
Protocol Title: Integrated Control Slide Staining for FFPE IHC.
- Slide Preparation: Cut 3-4 serial 4µm sections from the test FFPE block. Cut 1-2 sections from the validated positive control block. Label slides: Test, Negative Control (No-Primary), Isotype Control, Positive Control.
- Deparaffinization & Rehydration: Bake slides. Deparaffinize in xylene (3 changes, 5 min each). Rehydrate through graded ethanol (100%, 95%, 70%) to distilled water.
- Antigen Retrieval: Perform heat-induced epitope retrieval in pre-heated citrate buffer (pH 6.0) using a pressure cooker (95-100°C, 20 min). Cool for 30 min. Rinse in wash buffer (TBS-T).
- Endogenous Peroxidase Block: Incubate all slides in 3% H₂O₂ in methanol for 10 min. Rinse in wash buffer.
- Protein Block: Apply enough universal protein block (e.g., 2.5% normal horse serum) to cover tissue for 30 min at room temperature. Do not rinse; tap off excess.
- Primary Antibody Application:
- Test Slide: Apply optimized dilution of specific primary antibody.
- Positive Control Slide: Apply the same primary antibody.
- Negative Control Slide: Apply antibody diluent only.
- Isotype Control Slide: Apply matched irrelevant immunoglobulin at the same concentration as the primary antibody.
- Incubate for 1 hour at RT or overnight at 4°C in a humidified chamber.
- Detection: Rinse slides. Apply labeled polymer secondary antibody (e.g., anti-mouse/rabbit HRP) for 30 min. Rinse. Apply chromogen (e.g., DAB) for 3-10 minutes, monitoring development. Stop in water.
- Counterstaining & Mounting: Counterstain with hematoxylin for 30-60 seconds. Differentiate in bluing reagent. Dehydrate, clear, and mount with permanent mounting medium.
- Analysis: Image slides using consistent microscope settings. Compare test slide staining intensity and localization to all controls. Specific signal must be present in the positive control and absent in the negative/isotype controls.
This guide provides a comprehensive technical overview of digital pathology and quantitative image analysis, framed within the essential workflow of immunohistochemistry (IHC) for formalin-fixed, paraffin-embedded (FFPE) tissue. In modern translational research and drug development, transitioning from qualitative, subjective assessment to robust, high-throughput quantification is paramount. Digital pathology enables this shift by transforming glass slides into high-resolution digital whole slide images (WSIs), upon which advanced computational algorithms can extract reproducible, multiplexed, and spatially-resolved data. This whitepaper details the integration of digital image analysis into the IHC pipeline, from slide scanning to statistical interpretation, providing researchers with the methodologies to derive quantitative biological insights.
Fundamentals of Digital Pathology Workflow
The digital pathology pipeline extends the traditional IHC protocol, creating a bridge between wet-lab biology and computational analysis.
From IHC Staining to Digital Image
Following the completion of the standard IHC protocol for FFPE tissue (deparaffinization, antigen retrieval, blocking, primary/secondary antibody incubation, chromogenic development, counterstaining, and mounting), the glass slide is digitized using a whole slide scanner. These devices capture the entire tissue section at high magnification (typically 20x or 40x objective), generating a multi-gigapixel image file (e.g., in SVS, TIFF, or MRXS format). Critical scanning parameters include resolution (e.g., 0.25 µm/pixel for 40x), focus, and color fidelity.
Core Quantitative Data Types in IHC Analysis
Digital image analysis software is used to quantify biomarker expression from these WSIs. The primary quantitative endpoints are summarized in the table below.
Table 1: Core Quantitative Metrics in IHC Digital Image Analysis
| Metric | Description | Typical Application | Units/Output |
|---|---|---|---|
| Positive Pixel Detection | Quantifies area and intensity of chromogen stain (DAB, etc.). | Biomarker expression level (e.g., HER2, PD-L1). | Positive Area (%), Average Optical Density, H-Score. |
| Cellular Segmentation & Classification | Identifies individual cell boundaries and classifies cells (e.g., tumor, lymphocyte, stromal). | Tumor-infiltrating lymphocyte (TIL) analysis, phenotyping. | Cell Counts, Cell Density (cells/mm²), Positivity Index (%). |
| H-Score | Semi-quantitative metric incorporating intensity and proportion of positive cells. | Hormone receptor status (ER/PR). | Score from 0-300. |
| Allred Score | Combined proportion and intensity score for breast cancer biomarkers. | ER/PR clinical reporting. | Score from 0-8. |
| Spatial Analysis | Measures distances and relationships between different cell types or regions. | Immune cell proximity to tumor, compartmental analysis. | Nearest Neighbor Distance, Cellular Colocalization. |
Detailed Experimental Protocol for Quantitative IHC Analysis
This protocol assumes a completed, high-quality IHC-stained FFPE tissue section.
Protocol 3.1: Whole Slide Image Acquisition and Quality Control
- Scanner Calibration: Perform daily or weekly brightness and color calibration according to manufacturer specifications using a provided calibration slide.
- Slide Loading: Ensure slide barcode is readable. Load slides into the scanner autoloader or stage, avoiding dust or fingerprints on the glass.
- Scanning Parameter Setup:
- Select the 20x objective (0.5 µm/pixel) for general analysis or 40x (0.25 µm/pixel) for high-detail cellular work.
- Set the scan area to encompass the entire tissue section.
- Enable focus points across the tissue (e.g., 9-25 points) to account for tissue unevenness.
- Select the appropriate color profile for brightfield imaging.
- Initiate Scan: Start the batch scan. A typical 20x scan of a 15x15mm tissue takes 60-90 seconds.
- Quality Control (QC): Review the digital slide in a viewer.
- Check for focus artifacts, scanning debris, or blurred regions.
- Verify color representation matches the optical slide.
- Annotate and exclude from analysis any areas with folds, tears, or excessive artifact.
Protocol 3.2: Development of a Quantitative Image Analysis Algorithm (Phenotype-Based)
This methodology outlines creating a custom algorithm to identify and quantify CD3+ and CD8+ tumor-infiltrating lymphocytes (TILs).
- Software Selection: Use a commercial (e.g., HALO, Visiopharm, QuPath) or open-source (QuPath, CellProfiler) image analysis platform.
- Training Region Annotation:
- On a representative subset of WSIs (n=5-10), manually annotate:
- Tumor Region: Draw around the tumor parenchyma.
- Stroma Region: Draw within the adjacent connective tissue.
- For each compartment, annotate examples of 50-100 positive cells (brown DAB stain) and 50-100 negative cells (blue hematoxylin only).
- On a representative subset of WSIs (n=5-10), manually annotate:
- Algorithm Training (Machine Learning Approach):
- Color Deconvolution: Apply a spectral deconvolution algorithm (e.g., Ruifrok & Johnston method) to separate the hematoxylin and DAB (H-DAB) signals into distinct optical density (OD) channels.
- Cell Segmentation: Train a classifier to detect cell nuclei using the hematoxylin OD channel. Parameters include nuclear size, shape, and optical density thresholds.
- Phenotype Classification: Train a second classifier to label each detected cell as:
- CD3+ (or CD8+): DAB OD above a trained threshold within a cytoplasmic/perinuclear radius from the nucleus.
- Negative: DAB OD below threshold.
- Algorithm Validation:
- Apply the trained algorithm to a new set of WSIs (n=5, not used in training).
- Compare algorithm-generated cell counts and classifications against manual counts by an expert pathologist in 5-10 high-power fields per slide.
- Calculate concordance statistics (e.g., Pearson correlation R² >0.85, Cohen's kappa >0.7).
- Batch Analysis: Apply the validated algorithm to the entire cohort of WSIs. Output data includes: cell densities (cells/mm²) for CD3+ and CD8+ cells in tumor and stroma compartments, and CD8+/CD3+ ratio.
Diagram 1: Digital IHC Analysis Workflow
Signaling Pathway Analysis via Multiplex IHC and Spatial Quantification
Advanced multiplex IHC (mIHC) enables the simultaneous detection of 4-7 biomarkers on a single FFPE section, allowing for in-situ analysis of signaling pathway activity (e.g., PI3K/AKT/mTOR, MAPK) within the tumor microenvironment.
Table 2: Example Multiplex IHC Panel for PI3K Pathway Activation Analysis
| Target | Cell Compartment | Function in Pathway | Detection Color |
|---|---|---|---|
| p-AKT (Ser473) | Cytoplasm/Membrane | Key activated node, indicates pathway activity. | Magenta |
| p-S6 (Ser240/244) | Cytoplasm | Downstream effector of mTORC1. | Yellow |
| PTEN | Cytoplasm | Negative regulator; loss upregulates pathway. | Cyan |
| Pan-Cytokeratin | Cytoplasm | Tumor epithelium marker. | Red |
| CD3 | Membrane | T-cell marker (microenvironment context). | Green |
| DAPI | Nucleus | Nuclear counterstain. | Blue |
Protocol 4.1: Sequential Immunofluorescence (Seq-IF) mIHC Protocol (Abridged)
- FFPE Slide Preparation: Bake slides, deparaffinize, and perform heat-induced epitope retrieval (HIER).
- Primary Antibody Incubation: Apply first primary antibody (e.g., anti-p-AKT) optimized for multiplexing (monoclonal, high affinity).
- Tyramide Signal Amplification (TSA): Apply HRP-conjugated secondary antibody, followed by a fluorophore-conjugated tyramide reagent (e.g., Opal 620) to deposit the first fluorescent dye.
- Antibody Stripping: Apply a mild stripping buffer (e.g., pH 6.0 citrate buffer with SDS) to denature and remove the primary-secondary antibody complex, leaving the deposited fluorophore intact.
- Repetition: Repeat steps 2-4 for each subsequent primary antibody in the panel, using a different fluorophore (Opal 520, 570, 690, etc.) for each cycle.
- Counterstaining and Mounting: Apply DAPI, and mount with anti-fade medium.
- Multispectral Imaging: Scan the slide using a multispectral microscope or scanner capable of capturing the full emission spectrum at each pixel. Use spectral unmixing software to separate the overlapping signals of the individual fluorophores.
Diagram 2: Core PI3K/AKT/mTOR Pathway
The Scientist's Toolkit: Research Reagent Solutions
Table 3: Essential Materials for Digital IHC Quantification Workflow
| Category | Item | Function & Critical Features |
|---|---|---|
| IHC Reagents | Primary Antibodies (Validated for IHC on FFPE) | Specifically bind target antigen. Clone, species, and validated dilution are critical. |
| Detection Kit (e.g., HRP Polymer, TSA) | Amplifies signal. Low background and high sensitivity are key. | |
| Chromogen (DAB, AEC, etc.) / Fluorophores (Opal dyes) | Produces visible precipitate or fluorescence for detection. Must match scanner capabilities. | |
| Slide Preparation | Positive & Negative Control Tissue Microarrays (TMAs) | Essential for antibody validation and batch-to-batch normalization. |
| Automated IHC Stainer | Ensures protocol consistency and reproducibility for large studies. | |
| Digital Hardware | Whole Slide Scanner (Brightfield & Fluorescence) | Converts physical slide to high-resolution digital image. Scan speed, resolution, and z-stacking are key specs. |
| High-Performance Workstation & Data Storage | For image analysis and secure storage of large WSI files (often TBs). | |
| Analysis Software | Digital Image Analysis Platform (HALO, Visiopharm, QuPath) | Provides tools for algorithm development, validation, and batch analysis. |
| Statistical Software (R, Python, Prism) | For final data analysis, visualization, and hypothesis testing. |
Within the comprehensive study of Immunohistochemistry (IHC) protocols for Formalin-Fixed Paraffin-Embedded (FFPE) tissue, the choice of detection methodology is pivotal. IHC and Immunofluorescence (IF) represent the two principal techniques for visualizing antigen distribution in FFPE samples. This analysis provides a technical comparison, detailing protocols, applications, and quantitative performance metrics to guide researchers and drug development professionals in selecting the optimal method for their experimental objectives.
Core Principles & Direct Comparison
IHC typically uses chromogenic detection (e.g., DAB, forming a brown precipitate) visualized with brightfield microscopy. It is renowned for its permanence and compatibility with standard histopathology. IF relies on fluorophore-conjugated antibodies, emitting light at specific wavelengths upon excitation, and is detected via fluorescence microscopy. It enables multiplexing and superior signal-to-noise ratio.
Table 1: Core Comparative Metrics of IHC vs. IF on FFPE Tissue
| Parameter | Immunohistochemistry (IHC) | Immunofluorescence (IF) |
|---|---|---|
| Detection Mode | Chromogenic (Colorimetric) | Fluorescent (Emission) |
| Microscope Required | Brightfield | Fluorescence/Confocal |
| Multiplexing Capacity | Low (Typically 1-2 targets/cycle) | High (3-8+ targets simultaneously) |
| Signal Permanence | High (Years, slides can be stored) | Low (Months, fluorophores bleach) |
| Spatial Resolution | Standard histological context | High, especially with confocal |
| Quantitative Ease | Semi-quantitative (Intensity scoring) | Highly quantitative (Pixel intensity) |
| Background/ Autofluorescence | Generally low | Can be high, requires management |
| Primary Application | Diagnostic pathology, single-target analysis | Research, co-localization studies, multiplex phenotyping |
Detailed Experimental Protocols
Core Protocol for IHC on FFPE Tissue
- Deparaffinization & Rehydration: Bake slides at 60°C for 20 min. Immerse in xylene (3x, 5 min each), followed by graded ethanol (100%, 100%, 95%, 70% - 2 min each) and finally dH₂O.
- Antigen Retrieval: Place slides in pre-heated citrate buffer (pH 6.0) or Tris-EDTA (pH 9.0). Perform heat-induced epitope retrieval (HIER) using a pressure cooker (15 min at full pressure) or water bath (40 min at 95-100°C). Cool for 30 min. Rinse in PBS.
- Peroxidase Blocking: Incubate with 3% H₂O₂ in PBS for 10-15 min to quench endogenous peroxidase activity. Wash in PBS.
- Blocking: Apply a protein block (e.g., 5% normal serum, 2.5% BSA in PBS) for 30 min at room temperature (RT).
- Primary Antibody Incubation: Apply optimized dilution of primary antibody in antibody diluent. Incubate in a humidified chamber (1 hr at RT or overnight at 4°C). Wash in PBS-Tween (3x, 5 min).
- Secondary Antibody & Chromogen: Apply enzyme-conjugated secondary antibody (e.g., HRP-polymer) for 30 min at RT. Wash. Develop with DAB substrate (or other chromogen) for 2-10 min, monitoring under a microscope. Stop reaction in dH₂O.
- Counterstaining & Mounting: Counterstain with Hematoxylin (30-60 sec), rinse, blue in Scott's tap water. Dehydrate through graded alcohols and xylene. Mount with permanent mounting medium.
Core Protocol for IF on FFPE Tissue
- Deparaffinization, Rehydration & Antigen Retrieval: Identical to IHC protocol (Sections 3.1.1 & 3.1.2).
- Autofluorescence Reduction (Optional): Treat slides with 0.1% Sudan Black B in 70% ethanol for 10-15 min or use commercially available reagents. Wash thoroughly.
- Blocking: Apply a protein block (e.g., 5% normal serum, 2.5% BSA in PBS) for 1 hr at RT. For phospho-specific targets, consider adding phosphatase inhibitors.
- Primary Antibody Incubation: Apply fluorophore-conjugated primary antibody or unlabeled primary antibody in diluent. Incubate in a humidified chamber (1 hr at RT or overnight at 4°C). Wash in PBS-T (3x, 5 min).
- Secondary Antibody Incubation (If needed): Apply species-specific, fluorophore-conjugated secondary antibody (e.g., Alexa Fluor 488, 568, 647). Incubate for 45-60 min at RT in the dark. Wash in PBS-T (3x, 5 min in the dark).
- Nuclear Stain & Mounting: Apply DAPI (1 µg/mL in PBS) for 5 min. Wash. Mount with an anti-fade mounting medium (e.g., ProLong Gold). Seal edges with nail polish. Store slides at 4°C in the dark.
The Scientist's Toolkit: Key Research Reagent Solutions
Table 2: Essential Materials for IHC/IF on FFPE Tissue
| Item | Function & Rationale |
|---|---|
| FFPE Tissue Sections (4-5 µm) | Standard sample format preserving tissue morphology and antigenicity for long-term storage. |
| Heat-Resistant Slide Rack/Coplin Jar | For safe and efficient processing of multiple slides through solutions. |
| Citrate Buffer (pH 6.0) | Common antigen retrieval solution for breaking protein cross-links formed by formalin fixation. |
| HRP-Polymer Detection System | High-sensitivity, low-background IHC detection system. Eliminates endogenous biotin issues. |
| DAB Chromogen Substrate | Forms an insoluble, brown precipitate at the antigen site for brightfield visualization. |
| Fluorophore-Conjugated Antibodies (e.g., Alexa Fluor series) | Provide bright, photostable signals for multiplex IF. Must be matched to microscope filter sets. |
| Anti-Fade Mounting Medium | Preserves fluorescence signal by reducing photobleaching during microscopy and storage. |
| DAPI (4',6-diamidino-2-phenylindole) | Counterstain that binds DNA, labeling all nuclei for spatial reference in IF. |
Visualizing the Workflow & Key Consideration
Diagram Title: Decision Workflow for Choosing IHC or IF on FFPE Tissue
Diagram Title: Multiplex Immunofluorescence Experimental Setup
Quantitative Performance Data
Table 3: Quantitative Analysis of IHC vs. IF Performance Characteristics
| Metric | IHC (DAB) | IF (Alexa Fluor 488) | Measurement Method & Notes |
|---|---|---|---|
| Typical Signal-to-Background Ratio | 5:1 to 15:1 | 20:1 to 100:1+ | Measured via pixel intensity of target vs. adjacent negative area. IF offers superior dynamic range. |
| Photostability (Signal Half-Life) | >5 years (sealed slide) | ~1-4 weeks (with anti-fade) | Time until 50% signal loss under typical storage. IF requires careful handling. |
| Multiplexing Limit (Routine) | 2 targets (Sequential) | 4-8 targets (Simultaneous) | Limited by chromogen spectral overlap vs. fluorophore spectral separation. |
| Detection Sensitivity (Theoretical) | ~100-1000 copies/cell | ~10-100 copies/cell | IF generally more sensitive due to amplification and lack of enzymatic kinetics. |
| Compatibility with H&E | High (Common practice) | Low (Fluorescence obscures H&E) | IHC can be sequentially stained with H&E for enhanced morphology. |
The selection between IHC and IF for FFPE tissue analysis is not a matter of superiority but of appropriate application. IHC remains the gold standard for clinical diagnostics and single-target studies where morphological context and archival stability are paramount. IF is indispensable for advanced research requiring multiplex target quantification, co-localization analysis, and high-resolution subcellular imaging. A thorough understanding of both protocols, as detailed in this broader IHC methodology thesis, empowers the researcher to leverage the strengths of each technique to answer complex biological questions effectively.
Aligning IHC Protocols with CLIA/CAP Guidelines for Translational Research
Translational research aims to bridge laboratory discoveries with clinical applications, often utilizing immunohistochemistry (IHC) on Formalin-Fixed, Paraffin-Embedded (FFPE) tissues. For results to be clinically actionable, IHC protocols must align with the stringent, quality-focused requirements of the Clinical Laboratory Improvement Amendments (CLIA) and the College of American Pathologists (CAP) accreditation standards. This technical guide provides a step-by-step framework for researchers and drug development professionals to adapt research-grade IHC protocols into CLIA/CAP-compliant workflows, ensuring data integrity, reproducibility, and clinical relevance.
Core CLIA/CAP Requirements for IHC
CLIA and CAP establish standards for analytical test validation, quality control (QC), personnel competency, and documentation. Key pillars applicable to IHC include:
Table 1: Core CLIA/CAP Requirements for IHC Assays
| Requirement Category | Key Specifications | Typical CAP Checklist Code (IHC) |
|---|---|---|
| Test Validation | Analytic sensitivity/specificity, reportable range, reference range. Must be established before clinical use. | ANP.22900 |
| Quality Control | Daily runs of positive and negative controls. Monitoring of reagent lots. | COM.30000 |
| Procedure Manual | Step-by-step, detailed protocol with acceptance/rejection criteria. Updated annually. | COM.02500 |
| Personnel Competency | Defined qualifications, training, and biannual competency assessment for performers. | GEN.55400 |
| Equipment Maintenance | Calibration, preventive maintenance records for all instruments. | COM.04000 |
| Proficiency Testing | External proficiency testing at least twice annually. | GEN.15450 |
Step-by-Step IHC Protocol Alignment for FFPE Tissues
This workflow adapts a research protocol to meet compliance benchmarks.
A. Pre-Analytic Phase (Tissue Fixation & Processing)
- CAP Guideline: Preanalytic standards (ANP.23916) require fixation in 10% neutral buffered formalin for 6-72 hours.
- Aligned Protocol:
- Tissue Acquisition: Document tissue origin, collection time, and fixation start time.
- Fixation: Immerse tissue in 10% neutral buffered formalin. Fixation time must be recorded and fall within the validated range (e.g., 18-24 hours for core biopsies).
- Processing & Embedding: Use a standardized, documented tissue processor. Paraffin blocks must be labeled with at least two patient identifiers.
B. Analytic Phase (IHC Staining)
- CAP Guideline: Requires validated protocols, controlled reagents, and daily QC.
- Aligned Protocol:
Table 2: Validated IHC Staining Protocol for FFPE Sections (e.g., PD-L1 [Clone 22C3])
| Step | Reagent/Process | Duration | Temperature | CLIA/CAP Compliance Note |
|---|---|---|---|---|
| 1. Sectioning | Microtome cut | 4 µm | Ambient | Use charged slides. Document slide ID. |
| 2. Baking | Dry oven | 60 min | 60°C | Calibrated oven. |
| 3. Deparaffinization & Rehydration | Xylene, Ethanol series | Per validated protocol | Ambient | Use certified reagents. |
| 4. Antigen Retrieval | Citrate Buffer, pH 6.0 | 20 min | 95-100°C (Water Bath) | Method and pH must be validated for each antibody. |
| 5. Peroxide Block | 3% H₂O₂ | 10 min | Ambient | Lot documented. |
| 6. Protein Block | Serum-free protein block | 10 min | Ambient | Reduce nonspecific binding. |
| 7. Primary Antibody | Anti-PD-L1 (22C3) | 30 min | Ambient | Critical: Use FDA-approved/IVD kit or perform full validation for LDT. Apply to tissue controls. |
| 8. Detection System | HRP-labeled Polymer | 30 min | Ambient | Validated system. Lot documented. |
| 9. Chromogen | DAB | 5 min | Ambient | Monitor for precipitate. Time controlled. |
| 10. Counterstain | Hematoxylin | 1-5 min | Ambient | Differentiate in weak ammonia water. |
| 11. Mounting | Aqueous mounting medium | - | Ambient | Use non-fading medium. |
C. Post-Analytic Phase (Analysis & Reporting)
- CAP Guideline: Results must be reviewed by a qualified pathologist (or other certified personnel), with interpretative criteria defined in the procedure manual.
- Aligned Protocol:
- Scanning & Analysis: Use a validated whole-slide scanner (calibrated). Image analysis algorithms must be validated if used quantitatively.
- Pathologist Review: A board-certified pathologist reviews stained slides and controls.
- Reporting: Report includes patient ID, antibody clone, staining intensity/distribution, result based on validated scoring system (e.g., Tumor Proportion Score for PD-L1), and control status.
Validation of an IHC Assay for CLIA/CAP Compliance
Before implementation, a full validation is required for Laboratory Developed Tests (LDTs). For FDA-cleared/approved IVD kits, a verification study suffices.
Experimental Protocol: Comprehensive IHC Assay Validation
- Objective: Establish analytic performance characteristics of a new IHC antibody for an LDT.
- Materials: 20-50 positive and 10-20 negative FFPE cases (archival, remnant specimens).
- Methodology:
- Precision: Run 10 replicates of 3-5 cases (spanning positive, weak, negative) over 5 days. Calculate intra-run and inter-run coefficient of variation (CV) for quantitative results, or percent agreement for qualitative reads.
- Accuracy/Concordance: Compare results to a validated reference method (e.g., another validated IHC assay, in-situ hybridization) using Cohen's Kappa statistic (κ > 0.8 indicates strong agreement).
- Analytic Sensitivity: Perform serial dilutions of the primary antibody to determine the limit of detection (LOD).
- Analytic Specificity: Evaluate cross-reactivity via tissue microarray containing related epitopes. Perform peptide blockade assays.
- Reportable Range: Define the scoring system (e.g., 0, 1+, 2+, 3+) and its biological correlate.
- Robustness: Test impact of minor protocol deviations (e.g., retrieval time ± 5 min, room temperature variation).
Table 3: Example Validation Results for a Novel Biomarker "X"
| Performance Characteristic | Method | Acceptance Criteria | Observed Result |
|---|---|---|---|
| Inter-run Precision | 5 runs, 5 cases | Percent agreement ≥ 90% | 95% agreement |
| Accuracy | vs. Reference Assay (n=40) | Kappa (κ) ≥ 0.80 | κ = 0.88 |
| Analytic Sensitivity | Antibody Titration | LOD at 1:200 dilution | LOD at 1:250 dilution |
| Specificity | Tissue Microarray (n=50 tissues) | No non-specific staining in unrelated tissues | 2 minor cross-reactivities documented |
The Scientist's Toolkit: Essential Research Reagent Solutions
Table 4: Key Reagents and Materials for Compliant IHC
| Item | Function | CLIA/CAP Compliance Consideration |
|---|---|---|
| FDA-Cleared/IVD Antibody Kits | Primary antibody and detection system. | Preferred; simplifies verification. Clone and lot must be tracked. |
| Cell Line or Tissue Controls | Positive and negative process controls. | Must be included on every slide/run. Ideally, multi-tissue control blocks. |
| Certified Buffers & Detection Reagents | Antigen retrieval, wash buffers, chromogens. | Use reagents with Certificates of Analysis. Lot number documentation required. |
| Bar-Coded Slides & Label Printer | Patient sample tracking. | Reduces transcription errors. Integrated with Laboratory Information System (LIS). |
| Calibrated Pipettes & Timers | Accurate reagent dispensing and incubation timing. | Part of equipment maintenance log. Annual calibration required. |
| Whole Slide Scanner & Image Analysis Software | Quantitative analysis and archiving. | Software validation required for quantitative reporting. |
Visualizing the Compliant IHC Workflow & Pathway Analysis
Diagram 1: CLIA/CAP-Aligned IHC Total Workflow
Diagram 2: IHC Detection Principle & Signal Pathway
Aligning IHC protocols with CLIA/CAP guidelines is a non-negotiable prerequisite for translational research aiming to impact clinical practice or drug development. It requires a systematic shift from optimizing for discovery to standardizing for verification. This involves rigorous assay validation, unwavering daily quality control, comprehensive documentation, and the integration of standardized controls at every step. By embedding these principles into the foundational IHC protocol for FFPE tissues, researchers ensure their biomarker data is robust, reproducible, and ultimately, clinically trustworthy.
Conclusion
Mastering the IHC protocol for FFPE tissue requires meticulous attention to each step, from pre-analytical sample handling through detection and validation. A robust, standardized protocol, as outlined, is fundamental for generating reliable and interpretable data. Effective troubleshooting and rigorous validation are not optional but essential for ensuring reproducibility and scientific rigor. As digital pathology and artificial intelligence transform image analysis, adherence to these foundational principles will only grow in importance. Future directions include increased automation, standardized quantification, and sophisticated multiplexing, all of which will further cement IHC's critical role in advancing our understanding of disease biology, discovering novel biomarkers, and accelerating drug development for precision medicine.